Jamie B. here with another edition of Tips, Trends and Techniques Tuesday! I recently learned a super cool new technique that I am so excited to share with you today! It’s called Spherize and it’s easier than you think.
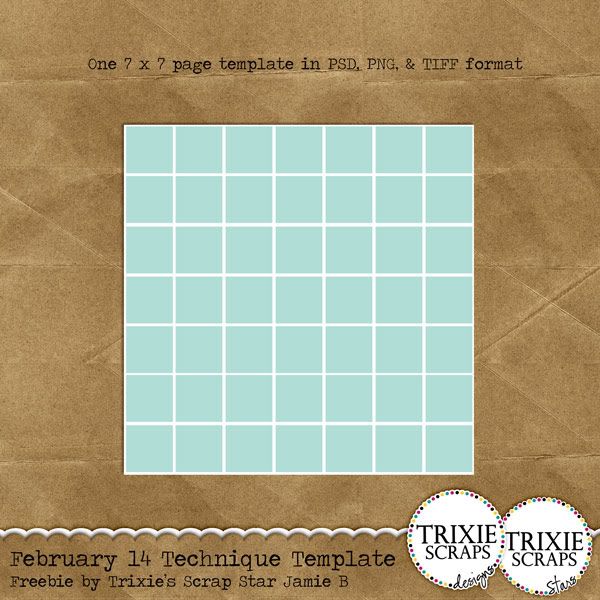
You’ll want to begin by starting with a blank 7″ x 7″ canvas (2100 x 2100 pixels). Make sure it’s also 300 dpi.

Arrange you photos however you like in some sort of grid pattern, focusing your favorites in the center. Once you have your photos arranged to your liking, in the layers display, right click on on any layer, and click flatten image.
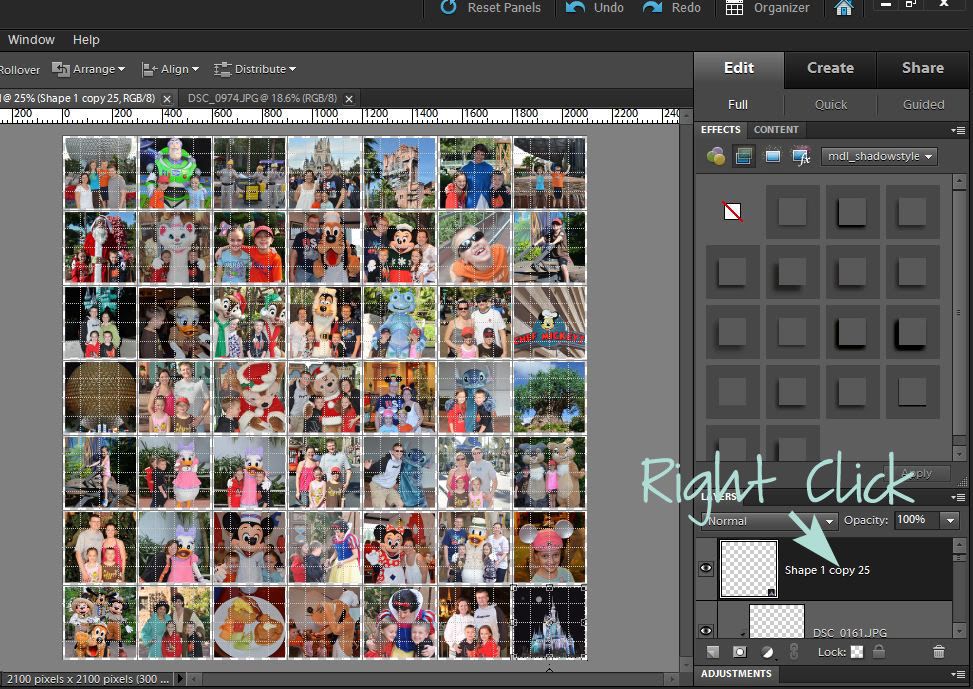
Next, on the left hand side, select the circle shape

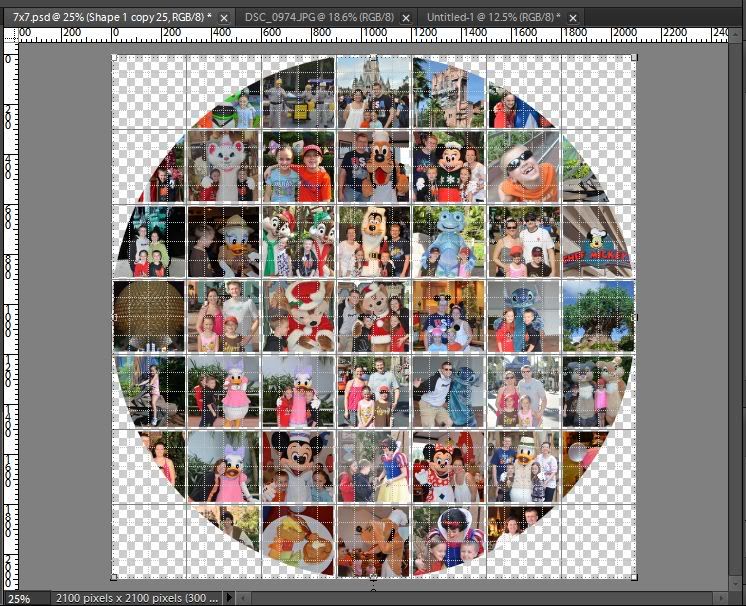
Go back to your flattened image and click and drag your mouse to create a circle from edge to edge. Once you’ve done this, Ctrl+Shift+I (press these all at the same time and this will select inverse). You should see the marching ants around your circle AND around your your 7 x 7 image. Click delete. Your image should now look like this:
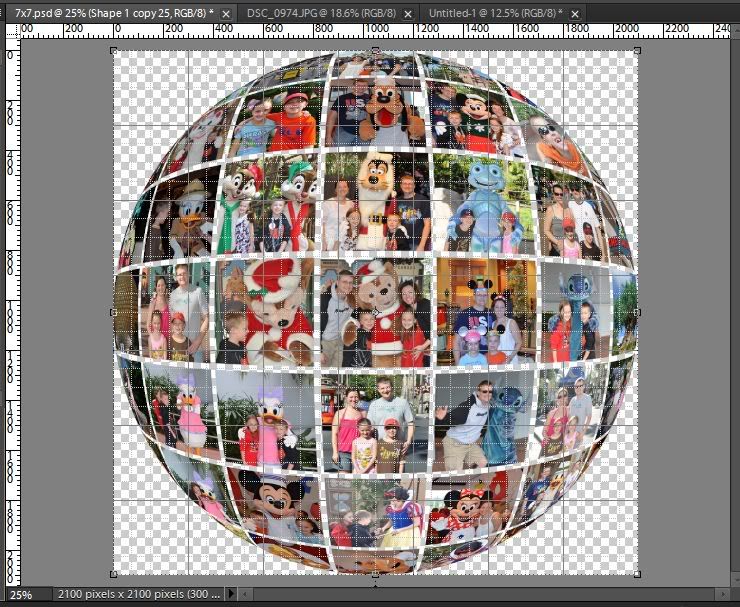
Now, the fun part! Up at the top of your drop down menus, select FILTER, then DISTORT, then SPHERIZE. Your image should now look like this:
You can stop right there if you like; however, it’s cool to have a bit of a reflection of your globe too. To do that, Select your image, then duplicate it (Ctrl+J). Select one of the identical images, and IMAGE, ROTATE, FLIP VERTICAL. Then tweak to your liking (I lowered the layer opacity and used the eraser tool to blend).
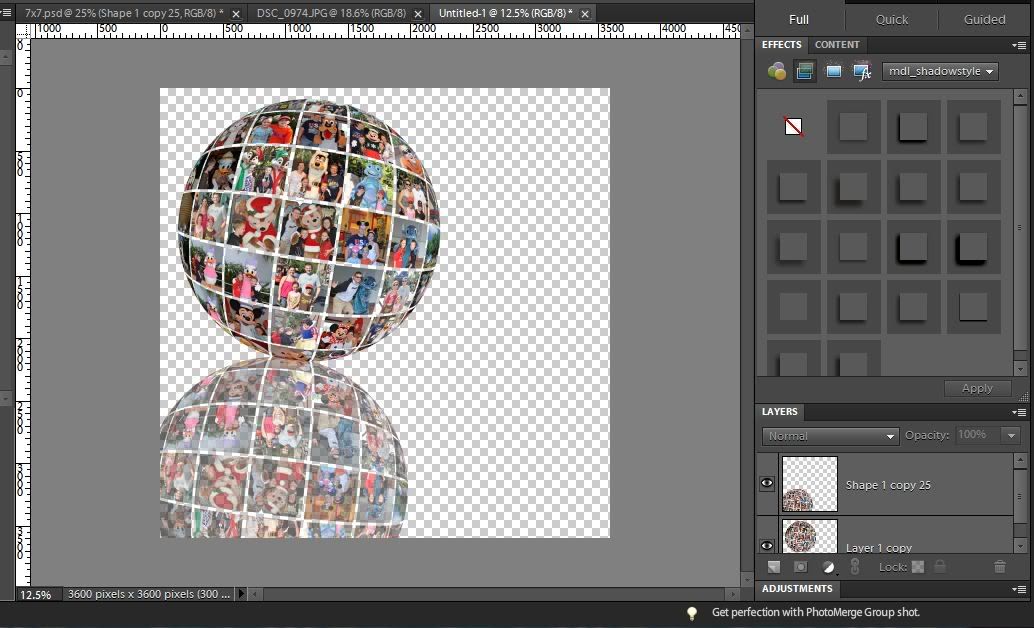
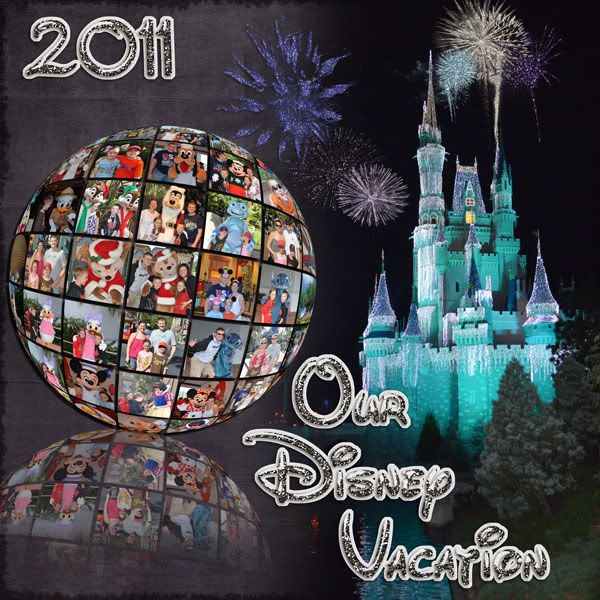
Here is my finished layout! I used If the Slipper Fits
If you like, I have also provided a 7 x 7 grid template for you to download, then just follow the steps above. Download HERE
See, easy peasy! If you are inspired to try out this cool technique, please load you layout in the Trixie Scraps Gallery so we can leave you some love! Plus, by creating a layout using Trixie Scraps products, and uploading it to Trixie’s Gallery, your layout will be included in our weekly Show Off slide show, and you’ll get a prize! It’s that simple!
SBC users stay tuned for next week’s edition of Tips, Trends & Techniques when Jennifer B. will show you how to do this technique in your program! I hope you learned something new today and thanks for stopping by!

All Trixie Scraps Designs products can be found in the following online stores:
Trixie Scraps Shop * My Memories * Gotta Pixel * Scrapbook Bytes * PickleBerryPop


Love this! Thank you so much!
I LOVE this Jamie!! Awesome tip!!!
Oh my…this is a fantastic technique and tutorial. Thank you so much. I can’t wait to try this. 🙂
Thank you so much for this post. I want to let you know that I posted a link to your blog in CBH Digital Scrapbooking Freebies, under the Page 7 post on Feb. 15, 2012. Thanks again.
Thank you so much for this post. I want to let you know that I posted a link to your blog in CBH Digital Scrapbooking Freebies, under the Page 7 post on Feb. 15, 2012. Thanks again.
Love this! Thank you so much for sharing.
This is so cool! Thank you for sharing!
Awesome!!! I’ve got to try this. Thanks so much for sharing! I love your layout!
Love this! Can’t wait to try it out!
Kait
I’m stuck on the Inverse step. PSE 10 won’t let me choose Inverse (it’s greyed out). Any suggestions?
@ Lori, I and working with Jamie on trying to figure this out for PSE 10. I am having the same problem…
Lori near Seattle, I had an error in the blog post instructions that I have now corrected. (It deals with the part with making the circle and the inverse). So sorry for the confusion!
For the sherizing technique, you should use the Merge features and NOT Flatten. Based on the screen shots, I think you actually merged (because your transparent areas remained transparent) but mistakenly used the term Flatten when you wrote out the instructions. The two are distinctly different things though they sound like they would be the same. When I tried this and used Flattening, I did not get the correct results, but using Merge worked.
I don’t know all the technical differences between Merge and Flattening, however, one difference is that flattening makes the transparent areas of the layer(s) white, which may or may not be desirable. Flattening also removes any shadows on the layer styles too.
This is so cool! I can’t wait to try this, thanks for the tut and template!
this is awesome, but I cannot change the opacity-can you give more specific instructions on that. Plus when I rotate/flip-it flips the original and the copy-how do I fix that? And how do I then put this onto a page?
Soccermom, can you submit a help ticket and ask for some help with this tutorial? When you put your ticket in, be sure to tell us what software you are using and we’ll do our best to help sort out your questions.
Help tickets can be submitted here:
https://www.trixiescraps.com/support
Thanks!
THANK YOU!! This is a great tutorial. Was so easy to do and I had a BLAST making my sphere.
Much easier than the way I have done my globes – thanks No template available to download – has it expired?