• Home
  • About Me
    • Meet the Designer
      • Trixie Scraps Designs
      • Trixie Media
      • Trixie Loves Teachers
      • North Meets South Studios
    • Meet the Creative Team
      • Scrap Star Carrin
      • Scrap Star Jennifer
      • Scrap Star Mary Kate
      • Scrap Star Shauna
      • Scrap Star Shilo
      • Scrap Star Stacy
  • Store
    • Ginger Scraps Shop
    • Scrap Girls Shop
  • Blog
    • Learn – Masters Monday
    • Inspire – Wisdom Wednesday
    • Grow – Challenge Thursday
    • Reward – Free Downloads
  • Client Testimonials
  • Newsletter
  • Guest CT Application
  • Contact
    • Frequently Asked Questions – FAQ
    • Ask for Help
    • Teachers License Terms of Use
    • Privacy Policy

Trixie Scraps Designs

Great Designs. Your Memories. Perfect Together.

You are here: Home / Masters Monday / Masters Monday {Create Your Own Digi Die-cut!}

Posted On: July 22, 2013 · Written By: Scrap Stars

Masters Monday {Create Your Own Digi Die-cut!}

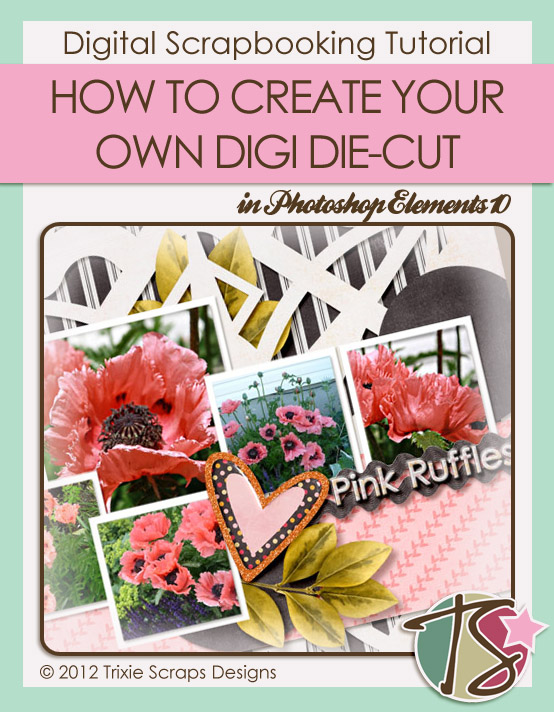
Hot enough for y’all these days? Even here in northern Canada it’s high summer and I’m just lovin’ it! So are all the weeds in my garden that I’ve neglected for the last couple of weeks. Rather than show you my weeds, I’m going to show you some of the blooms that I treated my neighbours to last month… and show you how to create digital die-cuts in PSE 10 just like the paper ones you can buy (for a lot of dough) at your Local Scrapbook Store.

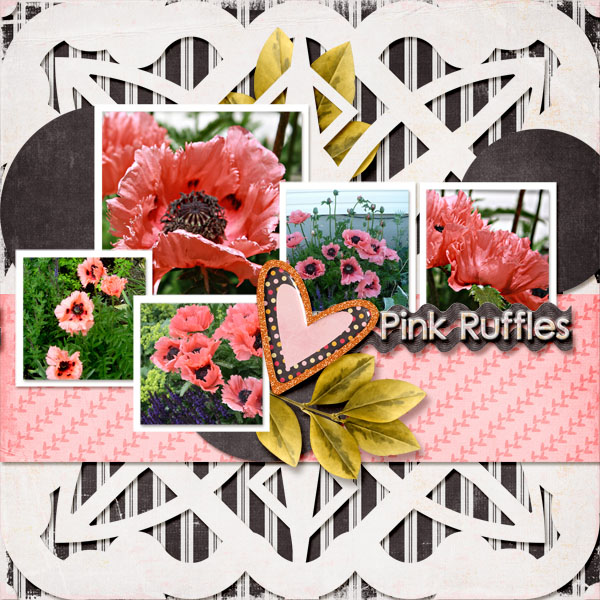
If you look at my layout you can see where I’ve “die-cut” the light gray paper and then tucked the leaves behind it. Wanna know how I did that??

Step 1: Open a new 12″ x 12″ file on your workspace. Make your background transparent and your resolution 300dpi. Set your foreground colour to a mid-gray so that you can see your work easily.

Step 2: Open up your “Custom Shape” tool and select a shape that has an open centre.

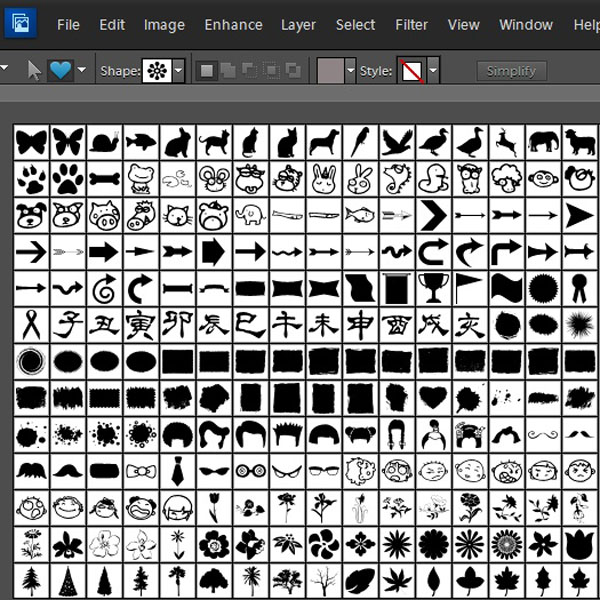
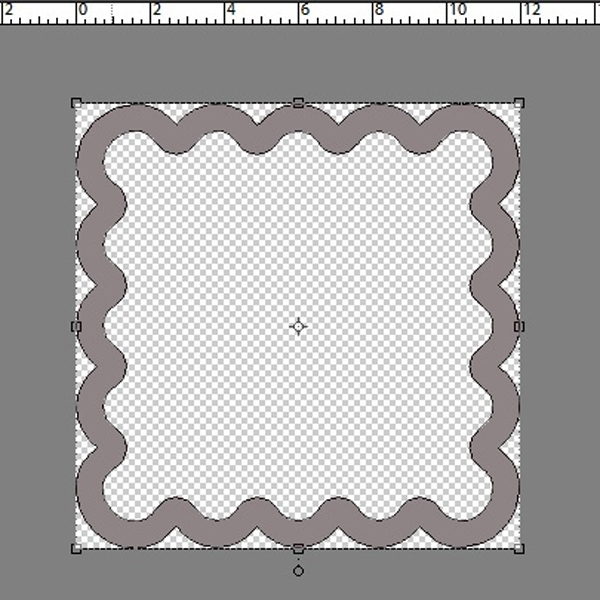
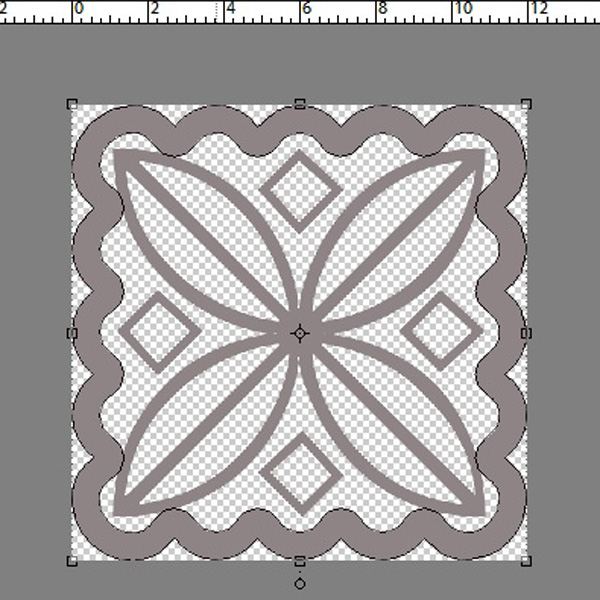
Step 3: I used a scallop-edged square. Pull out your shape on your workspace, keeping it square, then resize it to fit inside. Remember that the filled areas will be what’s left after you use your die-cut.

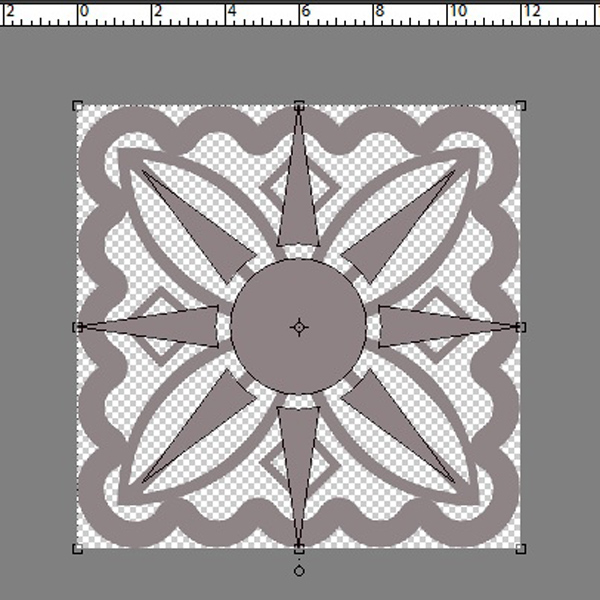
Steps 4-6: Select as many other custom shapes as you want just as you did in Step 3, laying each of them on top of the one before. They don’t have to completely fill the workspace; you can size them so that they make a pleasing image.

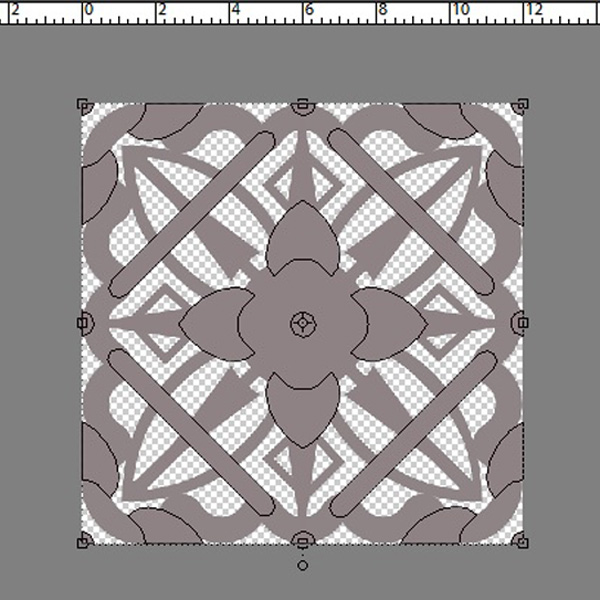
Step 7: Now that you’ve got something you like, you can go ahead and merge all the layers. Select All Layers>CTRL>E and then you’ll have something that looks like this, then save your work so that you can use your die-cut over and over and over!

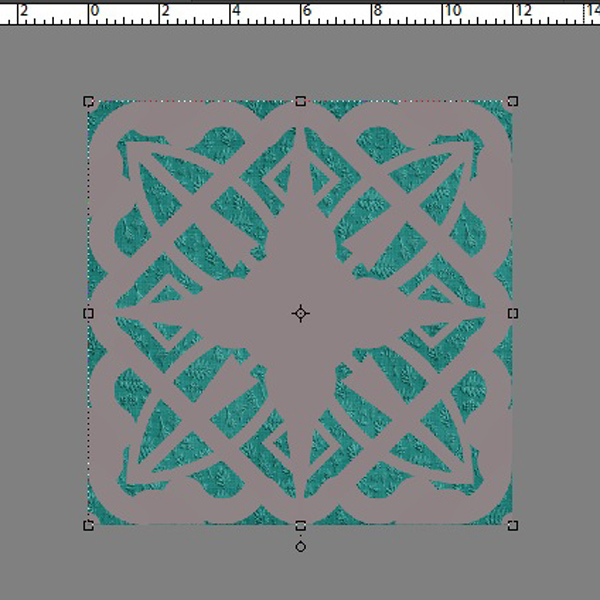
To use your new die-cut clipping mask drop it into your layout on top of your background paper. You can resize your mask to give you whatever effect you’re looking for.

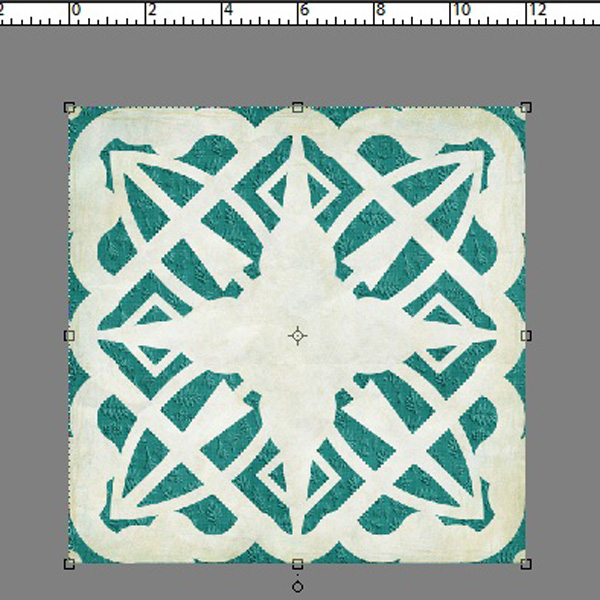
For my example I’ve used an embossed cardstock in back and a grungy solid die-cut, but as you can see in my layout, my background is striped and my die-cut is solid. Play around with your paper selection until you have something you love. There are lots of ways you can make this tutorial work for you. For example, you could turn on your grid then drop repeating custom shapes in a grid pattern to give you another type of die-cut clipping mask. You could choose a circular shape, like a snowflake or a sunburst as your base. The possibilities are endless. Give it a try and let me know how creative you’ve been!

~Jan

All Trixie Scraps Designs products can be found in the following online stores:
Trixie Scraps Shop * My Memories * Gotta Pixel * Scrapbook Bytes * Ginger Scraps

«
»

Filed Under: Masters Monday

Comments

  1. Felis says

    July 22, 2013 at 2:09 pm

    Hello, I send support ticket like you told me, but I don’t receive answer, so I wondering do everything is correct with it!

  • Facebook
  • Instagram
  • Pinterest
  • RSS
  • Twitter
  • YouTube

Stay in Touch!

Subscribe to my monthly newsletter to get updates on all my latest product releases, sales and free goodies, too! I've also provided options below for blog feed subscriptions, on either a daily or weekly basis. Don't miss a second of our awesome content!

Recent Posts

  • iNSD 2022 – Happy interNational Scrapbooking Day!
  • May 2022 Buffet Sale – You Say
  • April 2022 Buffet Sale – A Happy Song
  • April Fools Day Sale – Everything is 60% off!
  • March 2022 Daily Download Freebie Kit & Sale!
Guest Scrap Star Application

Archives

Categories

  • $2 Tuesday
  • Back from the Vault
  • Buffet Sale
  • Challenge Thursday
  • Digital Scrapbooking Freebies
  • Feature Friday
  • Fonts We Love Friday
  • Masters Monday
  • Merry Memories
  • Monthly Bake Sale
  • Monthly Desktop Freebies
  • News & Announcements
  • North Meets South Studios
  • Saturday with the Stars
  • Scrap Saturday
  • Sentiment Sunday
  • Special Request Sunday
  • Sunday Showoffs
  • Uncategorized
  • Wisdom Wednesday

Meta

  • Log in
  • Entries feed
  • Comments feed
  • WordPress.org

Helpful Links

  • Read My Blog
  • Visit My Shop
  • View Your Cart
  • Contact Me

Latest Freebies From My Blog

march 2022 daily download
dsd 2021

ABOUT TRIXIE SCRAPS... I'm Tracy, aka Trixie and owner/designer of Trixie Scraps Designs. I'm a 30-ish mama to 2 fur-babies, Lucy and Diamond. Creative to my core and married to shutterbug/big idea man/best guy ever, Erick. We currently live in a Kansas City suburb... but those who know me best know I'll always be a Jersey girl at heart. I'm a homebody and entrepreneur by nature Read More…

My Memories Suite Software Discount

MyMemories Suite Software Discount

Return to top of page · Copyright © 2025 Trixie Scraps Designs Great Designs. Your Memories. Perfect Together. · This site runs on Genesis for WordPress · Log in

Loading...

Insert/edit link

Enter the destination URL

Or link to existing content

    No search term specified. Showing recent items. Search or use up and down arrow keys to select an item.