• Home
  • About Me
    • Meet the Designer
      • Trixie Scraps Designs
      • Trixie Media
      • Trixie Loves Teachers
      • North Meets South Studios
    • Meet the Creative Team
      • Scrap Star Carrin
      • Scrap Star Jennifer
      • Scrap Star Mary Kate
      • Scrap Star Shauna
      • Scrap Star Shilo
      • Scrap Star Stacy
  • Store
    • Ginger Scraps Shop
    • Scrap Girls Shop
  • Blog
    • Learn – Masters Monday
    • Inspire – Wisdom Wednesday
    • Grow – Challenge Thursday
    • Reward – Free Downloads
  • Client Testimonials
  • Newsletter
  • Guest CT Application
  • Contact
    • Frequently Asked Questions – FAQ
    • Ask for Help
    • Teachers License Terms of Use
    • Privacy Policy

Trixie Scraps Designs

Great Designs. Your Memories. Perfect Together.

You are here: Home / Masters Monday / Tips, Trends, Techniques Tuesday – Creating a Soft Vignette

Posted On: March 13, 2012 · Written By: Scrap Stars

Tips, Trends, Techniques Tuesday – Creating a Soft Vignette

Lori here with today’s Tuesday technique. I love the soft vignette look for photos, but I could only find tutorials on how to do the vignette with the harder look. Trixie found an awesome tutorial on-line and I created some steps to help me out with it and I hope it helps you too! I did this tutorial using PSE 8, but will be very similar in other versions.

I chose a photo of my son playing out in the snow. It was very bright around the edges and I wanted to tone that down, so I thought this would perfect. I opened the photo in PSE.

We need to first create a new layer. I typically go to Layer Menu, click New, and then Layer. (There are other ways to do this same step.)

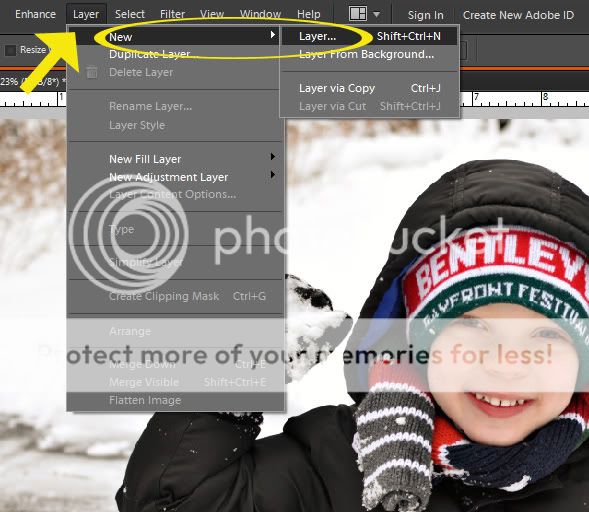
Now we need to fill the layer with black to create the base of our vignette. Make sure your new layer is selected and not the photo. Go the Edit Menu and click Fill Layer.

The Fill Layer dialog box will now be displayed. Under Contents, change the Use dropdown box to Black and then click OK.

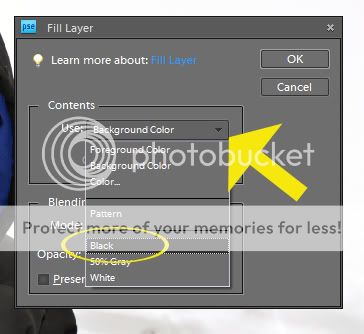
We need to change the blending mode of the black layer. Make sure the black layer is selected and click on the Blending Mode options and choose Soft Light.

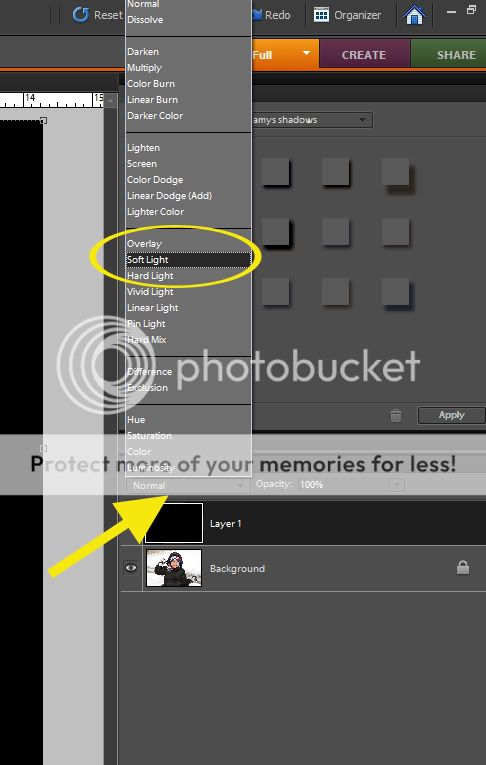
You will notice that the photo looks darker. We will change that in the following step.

We are now going to use the Eraser to create the darker edges on the photo to give the main object the framed look. Choose your Eraser tool.

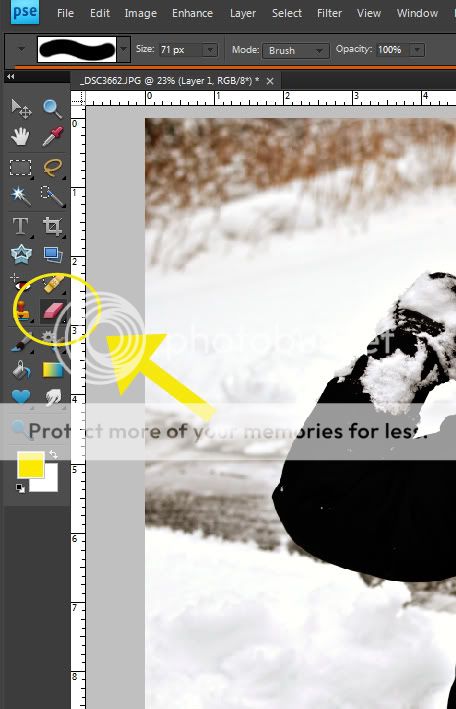
We now need to change our brush size and opacity. Click on the brush size dropdown and choose the 200 size brush (soft-edged).

Change the opacity of the brush to 20%.

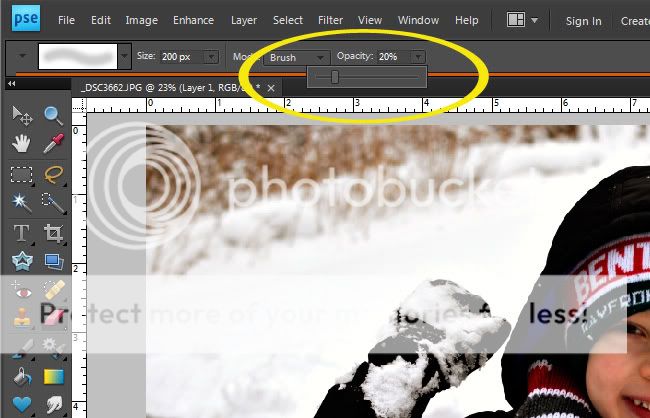
You can now erase to create the framing of your subject. There is no right or wrong way to do your erasing, so let your creativity flow!
Here is a look at my completed photo.

I love how the vignette toned down my photo. I was also testing out some other options and I created a red vignette and achieved a totally different look for the photo.

This tutorial was adapted from photoshopgirl.com

All Trixie Scraps Designs products can be found in the following online stores:
Trixie Scraps Shop * My Memories * Gotta Pixel * Scrapbook Bytes * PickleBerryPop

«
»

Filed Under: Masters Monday

Comments

  1. Natasha (alohacowgirl) says

    March 13, 2012 at 10:22 am

    So simple! I don’t know why I never thought to do that. 🙂
    Love your Tuesday tips… keep ’em coming!

  • Facebook
  • Instagram
  • Pinterest
  • RSS
  • Twitter
  • YouTube

Stay in Touch!

Subscribe to my monthly newsletter to get updates on all my latest product releases, sales and free goodies, too! I've also provided options below for blog feed subscriptions, on either a daily or weekly basis. Don't miss a second of our awesome content!

Recent Posts

  • iNSD 2022 – Happy interNational Scrapbooking Day!
  • May 2022 Buffet Sale – You Say
  • April 2022 Buffet Sale – A Happy Song
  • April Fools Day Sale – Everything is 60% off!
  • March 2022 Daily Download Freebie Kit & Sale!
Guest Scrap Star Application

Archives

Categories

  • $2 Tuesday
  • Back from the Vault
  • Buffet Sale
  • Challenge Thursday
  • Digital Scrapbooking Freebies
  • Feature Friday
  • Fonts We Love Friday
  • Masters Monday
  • Merry Memories
  • Monthly Bake Sale
  • Monthly Desktop Freebies
  • News & Announcements
  • North Meets South Studios
  • Saturday with the Stars
  • Scrap Saturday
  • Sentiment Sunday
  • Special Request Sunday
  • Sunday Showoffs
  • Uncategorized
  • Wisdom Wednesday

Meta

  • Log in
  • Entries feed
  • Comments feed
  • WordPress.org

Helpful Links

  • Read My Blog
  • Visit My Shop
  • View Your Cart
  • Contact Me

Latest Freebies From My Blog

march 2022 daily download
dsd 2021

ABOUT TRIXIE SCRAPS... I'm Tracy, aka Trixie and owner/designer of Trixie Scraps Designs. I'm a 30-ish mama to 2 fur-babies, Lucy and Diamond. Creative to my core and married to shutterbug/big idea man/best guy ever, Erick. We currently live in a Kansas City suburb... but those who know me best know I'll always be a Jersey girl at heart. I'm a homebody and entrepreneur by nature Read More…

My Memories Suite Software Discount

MyMemories Suite Software Discount

Return to top of page · Copyright © 2025 Trixie Scraps Designs Great Designs. Your Memories. Perfect Together. · This site runs on Genesis for WordPress · Log in

Loading...

Insert/edit link

Enter the destination URL

Or link to existing content

    No search term specified. Showing recent items. Search or use up and down arrow keys to select an item.