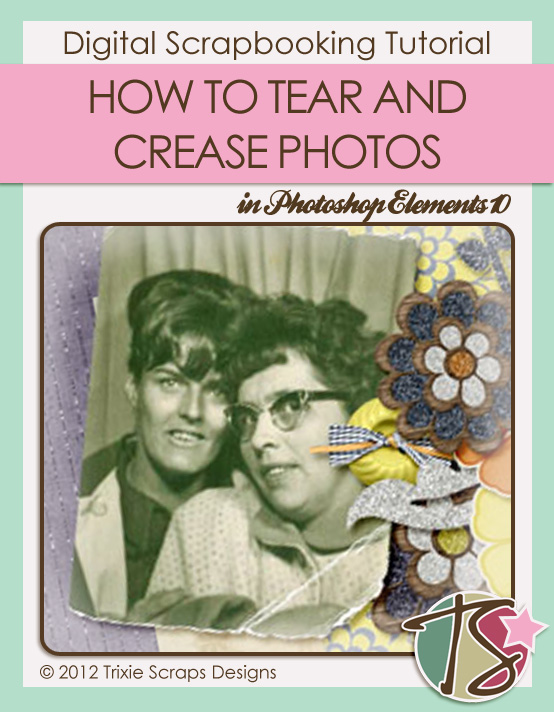
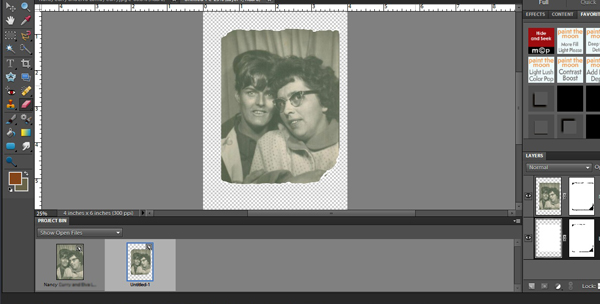
Happy Monday, y’all! Hopefully you have a great day… and why not start it out with this week’s Masters Monday tutorial? I had this photo booth photo in one of my folders and there was something about it that just didn’t ring true, given its age. The lovely lady on the right is my grand-aunt Elva. She passed away in 2011 at the age of 79 and the sweetheart on the left is my dad’s cousin Nancy who just celebrated her 70th birthday in July. The original photo is “perfect” – no tears, no creases, no signs of age at all. So I decided to tear it, just as if I’d ripped it from the strip. When you tear photo booth strips, you also sometimes crease the paper. When I was finished I had a photo that looked much more natural. And here’s how I did it… (Oh, before I forget – again – when I give keyboard shortcuts for my PC, you Mac users will substitute Command for Control…)
First step: Open a new file larger than your photo, with a transparent background. Plop your photo onto this background layer. In your layers palette, highlight your background layer.
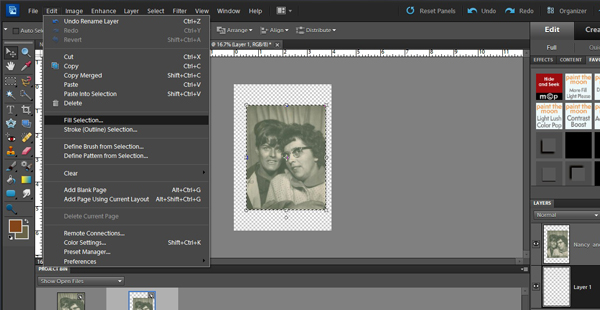
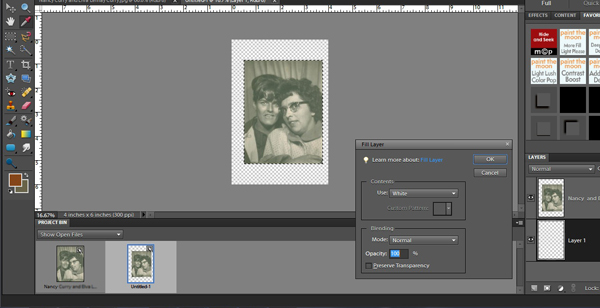
CTRL]click on the photo thumbnail, which will give you some marching ants around your photo, and select Edit]Fill Layer]White. Now your first layer is a white rectangle identical to your photo.
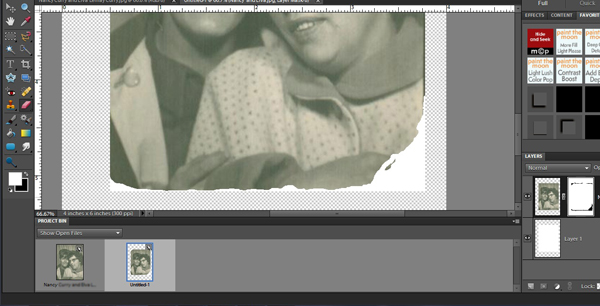
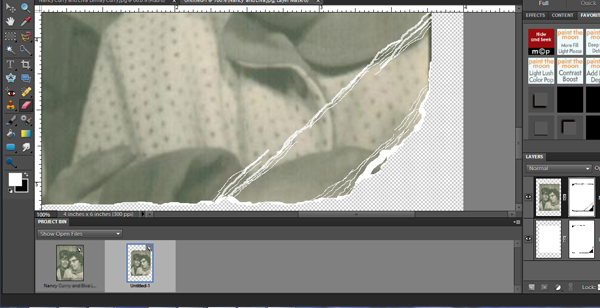
Now move to your photo layer and click on the layer mask icon under your layers palette. It’s the square with the white circle in it. Make sure the foreground colour in your tool bar is white, then select the eraser tool. Set the diameter to somewhere around 35 pixels. zoom in really close so you can see clearly what you’re doing. Start at one corner and begin erasing your photo. This is where shaky hands are especially helpful! You want your edge where the tear is to be jagged. Tear off as much of the photo as you like.
When you’re happy with your tear, move to your white layer and open a layer mask for it too. Following the same steps as for the photo layer, erase the white background. Keep in mind that paper never tears cleanly, and photographic paper – which has multiple layers – will tear quite imperfectly. So some areas of your white can be erased right to the edge of the photo and some should be wider.
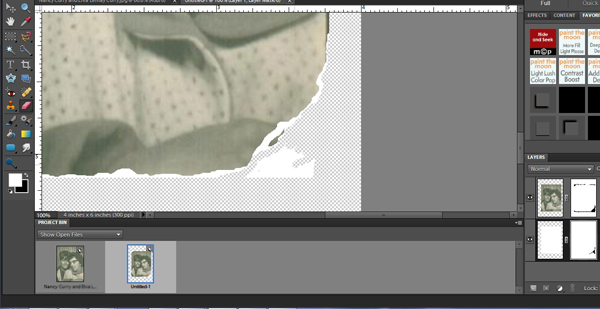
See that little fragment of photo in the middle of a sea of white? Well, sometimes photos and other papers, card stock for example, will tear just like that. Now, because my photo is from a photostrip, I tore it off at the top and the bottom.
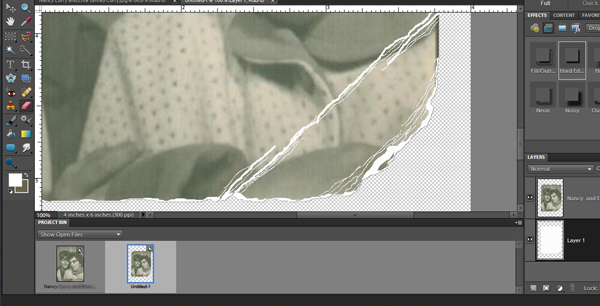
Sometimes tearing paper causes the paper to crease near the tear line. I wanted to make my photo look its age and so a crease was a required element. Creases break the fibre in the paper but don’t go all the way through. I drew a nearly-straight line diagonally across the corner of my photo just above my biggest tear using the eraser tool set to about 8 pixels on my photo layer mask. Then I added some shorter secondary creases.
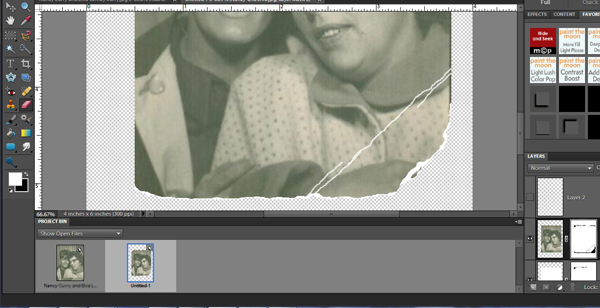
The point where the crease meets the edge of the paper will tear a little, so I went down to my white layer and erased a few pixels here and there to make it real.
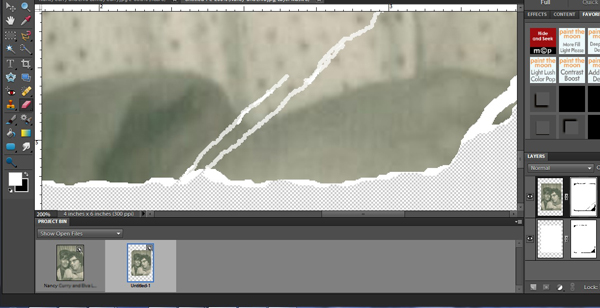
Old black and white photographic paper is coated with a silver halide-colloid emulsion. Creases in this kind of paper will result in cracks in the emulsion. So my next step was to add some of those, again using the eraser tool set at 1 pixel.
You can use a filter on this layer to make your “paper” look more like paper, such as Filter]Texture]Texturizer]Canvas. Use the sliders to adjust the scaling (how fine or coarse the texture will look) and relief (how obvious the texture will be); make sure the light source is the same as the angle you’ll use for your shadows. I haven’t shown this step because it really is a matter of taste.
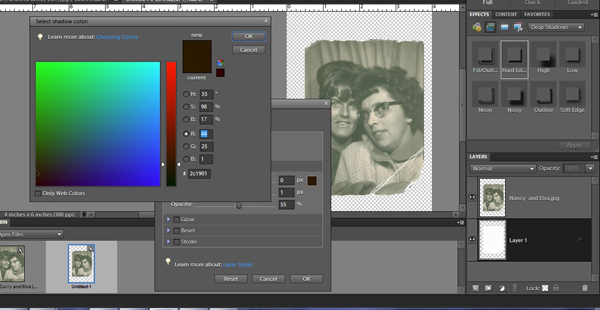
All that’s left after that is to put just the suggestion of a shadow on the white layer.
The finished tears and creases look like this. Save your work as a .png file, otherwise you’ll have a white background and you won’t be able to see your torn paper at all. (Learn from my mistakes!)
I used my photo to create this layout, along with Trixie’s Natural Beauty kit.

Please don’t hesitate to offer comments, criticism or suggestions for future tutorials. I hope you’ll use this one a lot!!
~Jan

All Trixie Scraps Designs products can be found in the following online stores:
Trixie Scraps Shop * My Memories * Gotta Pixel * Ginger Scraps


