I’m guessing that some of you out there started with paper crafts before digital scrapbooking, which means that – like me, you have tons of stuff that may not get a whole lot of use anymore. For me this includes all the rubber stamps I used when I used to make cards.
I decided it was time to breathe new life into my stamps and incorporate them into my digital scrapbooking.
Let me preface this post with saying that there is no copyright infringement intended in this tutorial and I am going to apologize for using Christmas themed stuff in the middle of summer.
Let’s get started.
The easy part of this is to choose your stamp and then stamp it on a piece of paper. I would recommend using black ink.
When you’ve got your stamped image scan it into your graphics program.
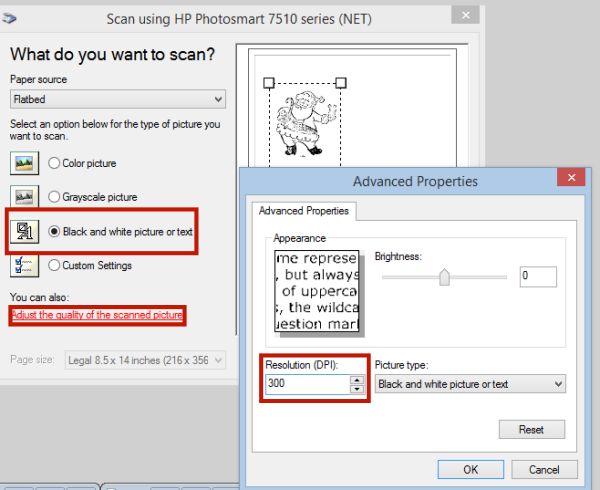
As you can see I scanned it in as a black and white picture or text. Then I clicked on the advanced button to make sure it was scanned in at 300 dpi, so that resolution matched the rest of the kit.
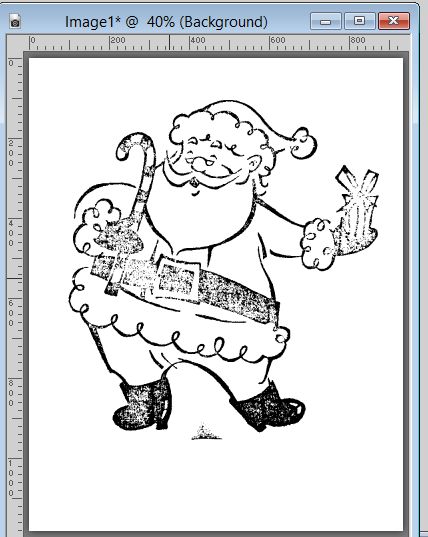
When you’ve got it scanned it – it’ll look something like this.
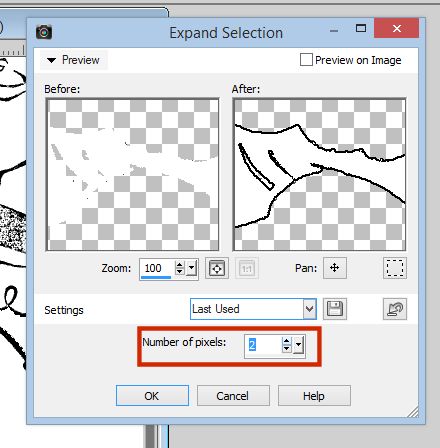
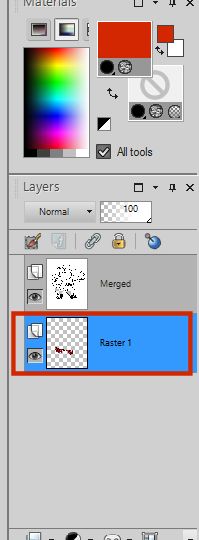
Now we’ll start ‘coloring’ in our image. So select the first section of the stamp you want to color in. From there go into your tool palette and select SELECTIONS – MODIFY – EXPAND.
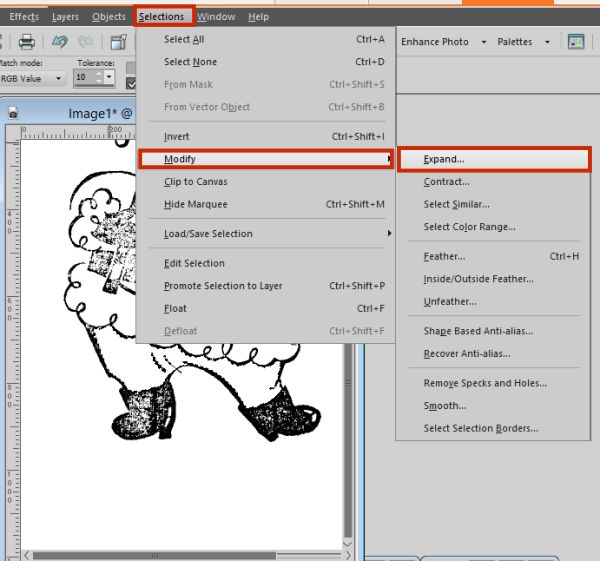
I like to expand my selections by about 2 pixels.
When the selection has expanded, I make sure I create a new layer and then I flood fill the selection with the paper/color of my choice.
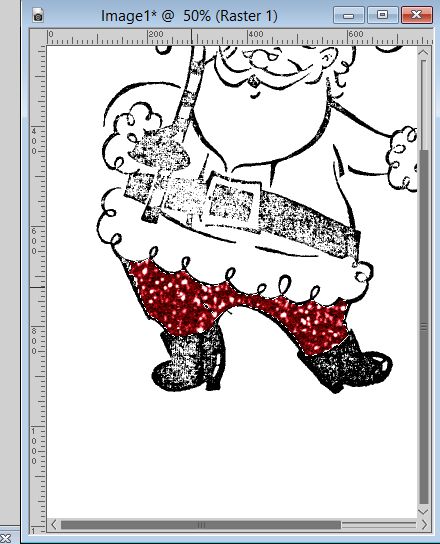
After the selection has been filled and with the marching ants still around the selection, I click on the starting layer and then click delete.
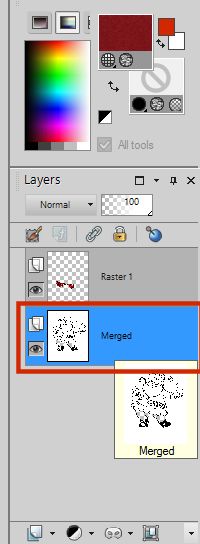
You won’t see anything happen in your main image, but looking at your layers – you can see you’re deleting the main color of the first image. If you really want to make sure it deleted, hide your filled layer and you should have a transparent section in the section you were working on.
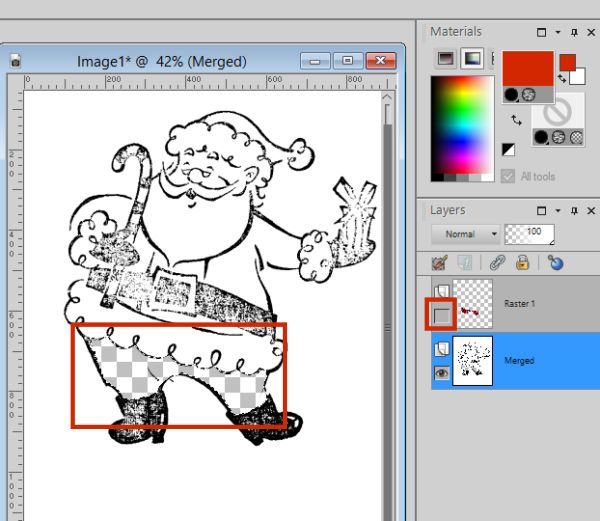
From there you’ll want your filled image placed underneath the main image. This is why we delete the main image colors.
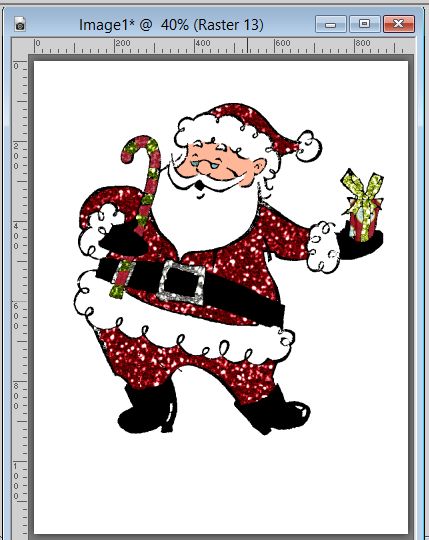
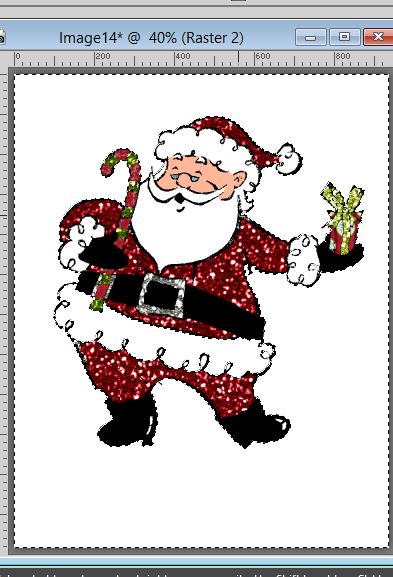
Continue filling in each section of your image this way and when you’re done, you’ll have something that looks like this.
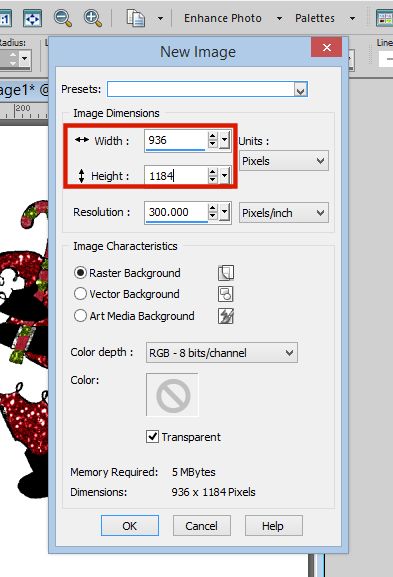
Now we’re going to make the background of our image transparent. We don’t want the full white background in our layouts. Our first step is to find out the dimensions of our image. We do that by clicking on IMAGE in our tool palette bar and then RESIZE.
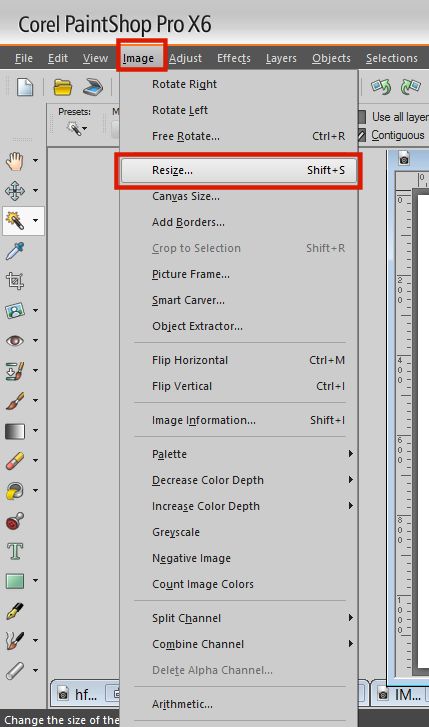
We want to look at what our ORIGINAL DIMENSIONS are. Take a note of them and then make sure you click CANCEL in that window.
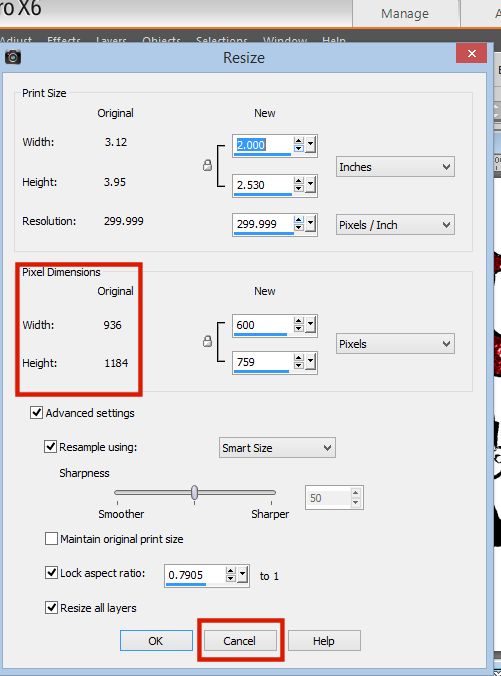
We then open up a NEW DOCUMENT with those dimensions.
Copy our original image and paste it as a new layer onto our new document. We then select all the white background of our image and make sure the marching ants are only around our image and not into it. Then we click delete.
We will then have our completed image on a transparent background, ready to use in our layouts.

A few things to note about your completed image. When you are copy/pasting it into your layout, you’ll want to copy it as a merged file. You may also need to resize your image depending on it’s use. For my layout I didn’t need to do any resizing.
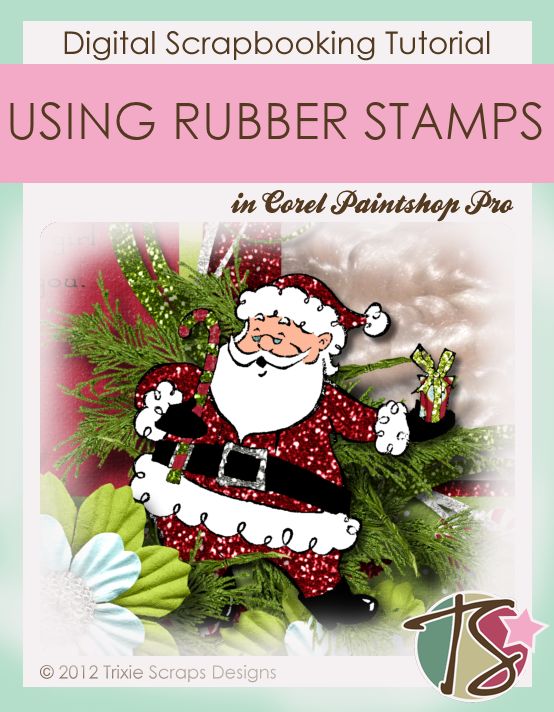
My layout was made using the Presents Everywhere kit along with the Bonus Paper, Cardstock, and Glitter Papers. The template I used is found in the Standing Alone Vol. 5 template pack.

 All Trixie Scraps Designs products can be found in the following online stores:
Trixie Scraps Shop * My Memories * Ginger Scraps


