Happy Monday everyone! I hope you’re all excited to be starting a new week. I have a fun tutorial for you all today on how to make your very own siggy, or signature tag, in Photoshop CS4. Since Halloween it coming up, I wanted to spruce up my forum signature, and I thought I’d take this chance to create a little tutorial for those of you who may not have made one before.
The first thing I like to do when creating a siggy is come up with a great theme. This month, Halloween is on my mind, so that was easy for me. I’ll be using North Meets South Studios’ One Haunted Evening which should give a nice elegant twist to this fun theme.

Next up, I like to find the perfect font. Now I don’t know about you, but my font collection is a little out of control. On last count I had more than 1400 fonts, so this step can take me a while. To me, A Lolita Scorned by AngeliQ works perfectly for this theme. Click on the font name, or the image below to download this font for your own collection.

Now when I make a siggy, I like to start with a full 3600 by 3600 pixel page. I’m never quite sure how the dimensions of my final siggy are going to end up, but this gives me lots of room to work with and lets me resize at the end.

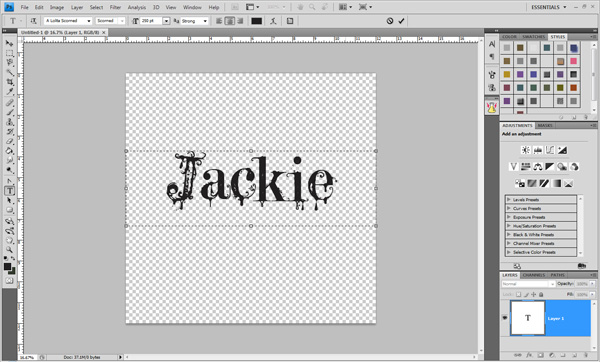
To me, a siggy tag is all about showing off my name, so I like to get that on the page right away. I try to choose a font size that is about a quarter to third of the height of my page (which would make it about 900 to 1200 pixels high). I usually start with it in the center of the page, and then move it around later when I have all of my other elements out.
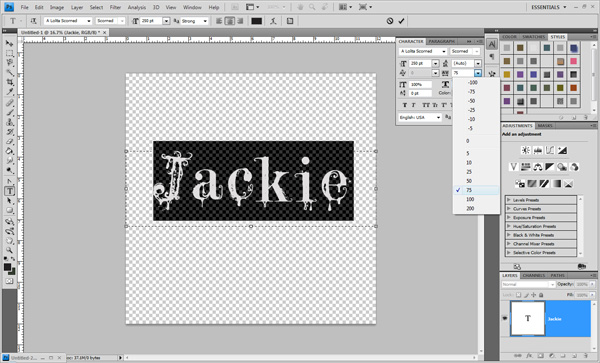
With the font I am using today, I also made some adjustments to the tracking of the font. I wanted a little bit more space between the letters, to make sure that I have some room to create a background layer of paper behind my text.
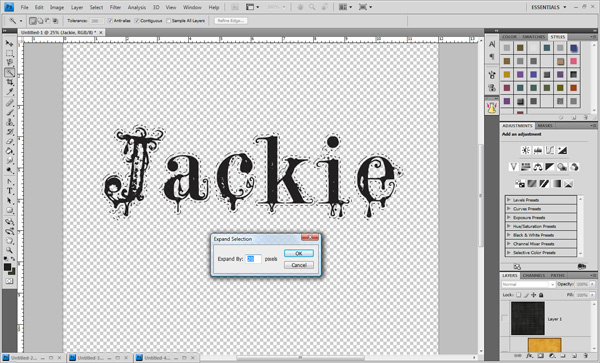
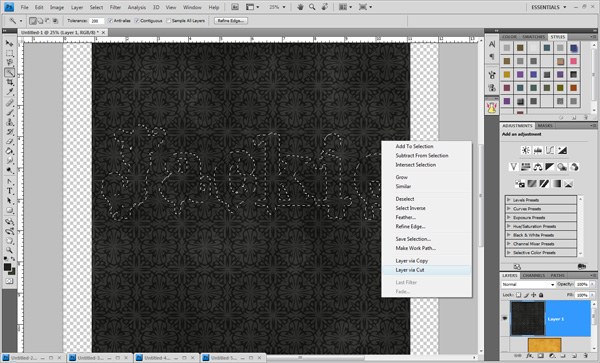
Since the name is the main focus of my siggy, I really like to make it standout. I usually do this by creating a stacked paper effect with the letters. First I pull the two papers that I want to use into my layout and make them hidden. I then use my magic wand tool to select all of the letters in my name. With a font like this one, be sure to zoom in and make sure all of the little drips and details are selected. From the top menu, I then go to the SELECT>MODIFY>EXPAND. In the dialogue box that pops up, I enter in how many pixels I want the border around my letters to be. I find this varies greatly by font, but for today’s siggy I chose 20 pixels.
Next, I make the paper that I want to be the backing layer visible again. Notice that when I do this, the dotted line of my selection is still visible. Making sure that the background paper layer is selected in the layers menu, I left click and choose to Layer via Cut.
I then delete the layer that contains the paper surrounding the cutout, and drag the layer containing my cutout background paper to be the bottom layer in the layers panel. Next I make the top layer paper visible again, make sure that it is the layer above my font layer, and use Ctrl+Alt+G to clip it to the text. I then apply a drop shadow to the text layer so that it looks like the two papers are stacked.

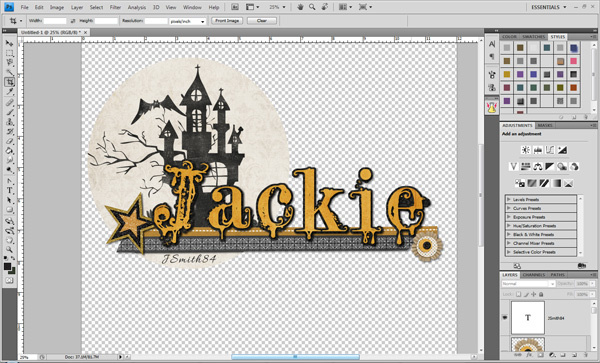
Alright, now comes the fun part: decorating. This part is all up to you and your personal preference. I usually like to include some paper cutouts behind at least a portion of my name, and then choose my elements. I cannot stress enough though that this really is all about you. You’ll notice on my finished tag that I’ve included my forum user name on the paper cutout. I always like to do this since that’s how most people around the forums at various sites know me. Here is what I came up with.
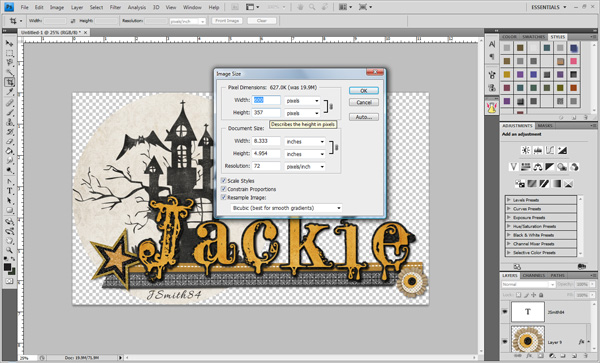
The last step in this process is resizing your canvas and saving. I use the crop tool to get rid of all of the blank space on the layout. Then I choose IMAGE>IMAGE SIZE from the top menu to resize. In the dialogue box that comes up I first set the resolution to 72, since this image will be for viewing on a computer only and won’t be for print. I then set the width of the image to 600 pixels and the height automatically adjusts proportionately.
After that, it is simply a matter of saving the image as a JPEG. I usually use a quality of 9 or 10.

And there you have it. I hope you found this tutorial helpful. If you create a siggy this month using a Trixie Scraps kit, please share it with us in the Gallery.

All Trixie Scraps Designs products can be found in the following online stores:
Trixie Scraps Shop * My Memories * Gotta Pixel * Scrapbook Bytes


Thank you!