• Home
  • About Me
    • Meet the Designer
      • Trixie Scraps Designs
      • Trixie Media
      • Trixie Loves Teachers
      • North Meets South Studios
    • Meet the Creative Team
      • Scrap Star Carrin
      • Scrap Star Jennifer
      • Scrap Star Mary Kate
      • Scrap Star Shauna
      • Scrap Star Shilo
      • Scrap Star Stacy
  • Store
    • Ginger Scraps Shop
    • Scrap Girls Shop
  • Blog
    • Learn – Masters Monday
    • Inspire – Wisdom Wednesday
    • Grow – Challenge Thursday
    • Reward – Free Downloads
  • Client Testimonials
  • Newsletter
  • Guest CT Application
  • Contact
    • Frequently Asked Questions – FAQ
    • Ask for Help
    • Teachers License Terms of Use
    • Privacy Policy

Trixie Scraps Designs

Great Designs. Your Memories. Perfect Together.

You are here: Home / Masters Monday / How To Create Gift Tags

Posted On: December 1, 2014 · Written By: Shilo

How To Create Gift Tags

Welcome to December, Trixie Scraps fans and welcome to another wonderful installment of Master’s Monday. Today we’re going to show you how to create gift tags.

pinterest_gifttags

Gift Tags 101

Because the gift giving season is upon us, I thought that the perfect tutorial for the start of the month would be one on creating gift tags. They really are super simple and you can get them done quick. Plus it’s one more way to use your digital scrapbooking stash. It’s also a nice idea because as long as you keep your file saved and have ink in your printer, you don’t have to worry about running out of tags at the last minute.

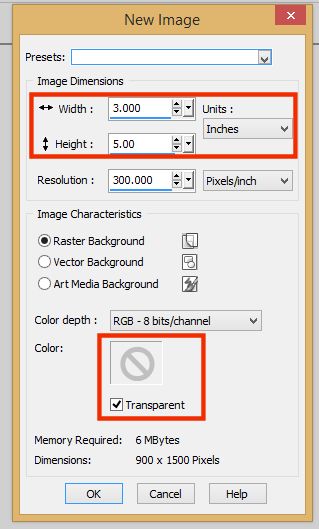
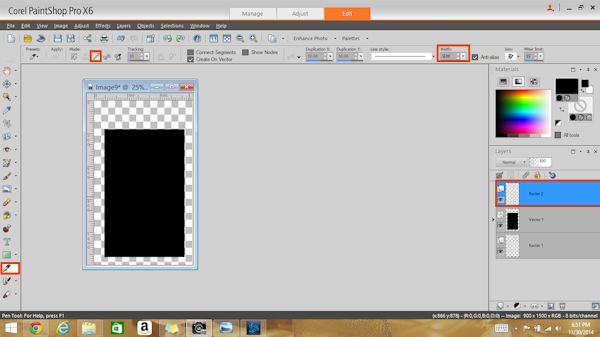
Your first step is to decide what size you want to work with. For my example I went with a size of 3 x 5. Always remember, work with a resolution of 300 px per inch and that you have a transparent background.

gift tag tutorial image 1

Your next step is going to be selecting your rectangle shape tool and drawing out a rectangle. Make sure you have your foreground and background set to the same color.

gift tag tutorial image 2

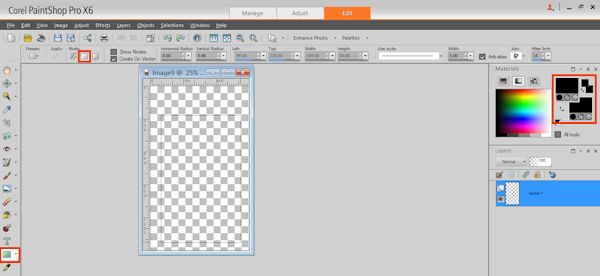
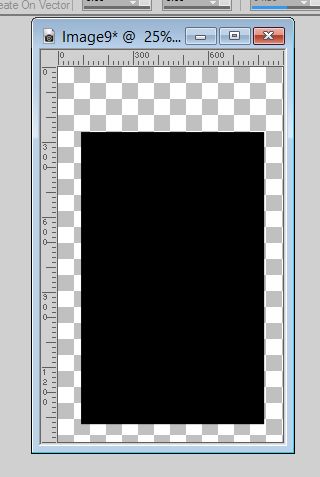
You should now have a filled in rectangle with whatever color you chose.

gift tag tutorial image 3

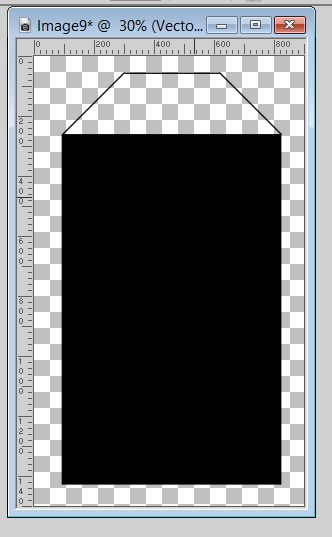
Next, create a new layer. Then you’ll want to select your pen tool and set that to point to point (unless you are perfect at drawing a straight line). We are going to be creating the top of our tag.

gift tag tutorial image 4

gift tag tutorial image 5

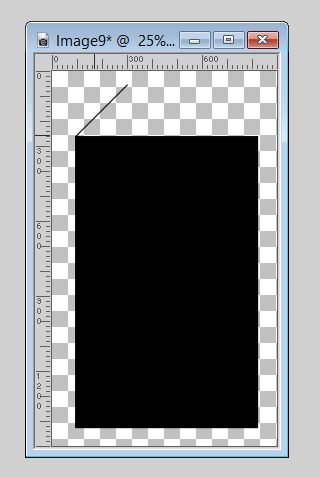
So we now have one side of the top of our tag, we need to get the other side and we want to create it on the same angle. I tried a few times and couldn’t get it right, so I just duplicated my first line and went from there.

gift tag tutorial image 6

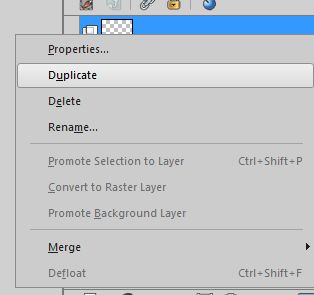
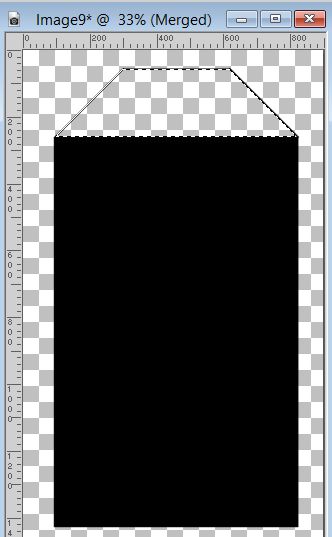
After I got my duplicated image, I flipped just that layer horizontally.

gift tag tutorial image 7

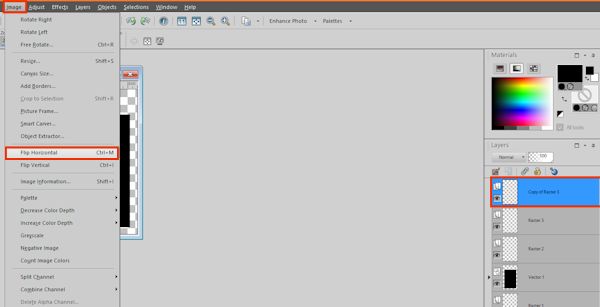
If done correctly, you’ll have an image that looks somewhat like this:

gift tag tutorial image 8

We will now move that duplicated layer over to the right side of the tag and then using our pen tool again, draw a line from corner to corner to form the top of the tag.

gift tag tutorial image 10

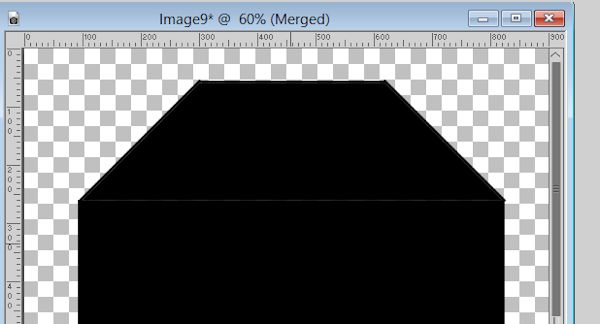
We now want to select the area that isn’t filled in with color and fill it in with the color we’ve been using throughout this process.

gift tag tutorial image 11

When you finish that, you may notice that not all the areas got filled in completely. Don’t worry. Just flood fill the line(s) in with your paint bucket tool and it should now be all completely filled in.

gift tag tutorial image 12

gift tag tutorial image 13

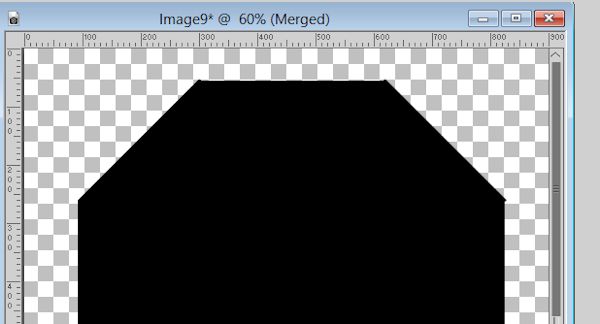
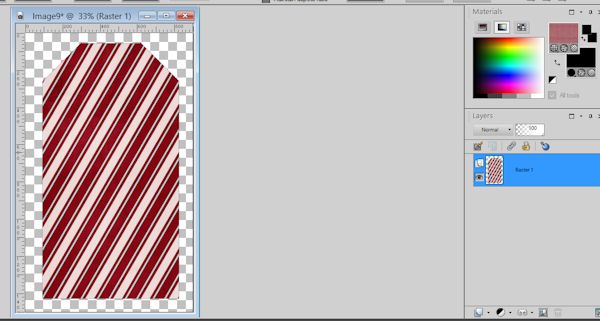
You will now have a tag that you can start dressing up anyway you want to. I’ll give you a few hints. Keep the black layer as your bottom layer. Select it so that you get the marching ants around your tag. Now flood fill with whatever paper you want on a new layer.

gifttags14

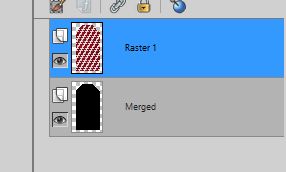
You can then delete the black (or whatever color you used) background and go to work.

gift tag tutorial image 15

Something to remember as well, you may have little pixels poking out here and there – if you’re not a perfectionist (I’m so not), you don’t need to worry about it too much. Remember these will be gift tags and you’ll most likely be cutting them out.

A Few Gifts Tags For Inspiration

I made a few different tags within the matter of an hour. If you save your files,  you can print these off at will and change names if saved as a .psp file or whatever program you’re working with.

My tags were all made using the kit Presents Everywhere.

Gift Tag Example 1 by Shilo

Gift Tag by Shilo

Gift Tag Example 2 by Shilo

Gift Tag by Shilo

Gift Tag Example 3 by Shilo

Gift Tag by Shilo

Now go grab a fun Christmasey, Gift-Wrappy kit and make some tags. Then make sure you share your work in the gallery. I’d really love to see what you can come up with.


«
»

Filed Under: Masters Monday Tagged With: digital scrapbooking, Presents Everywhere, trixie scraps, tutorial

  • Facebook
  • Instagram
  • Pinterest
  • RSS
  • Twitter
  • YouTube

Stay in Touch!

Subscribe to my monthly newsletter to get updates on all my latest product releases, sales and free goodies, too! I've also provided options below for blog feed subscriptions, on either a daily or weekly basis. Don't miss a second of our awesome content!

Recent Posts

  • iNSD 2022 – Happy interNational Scrapbooking Day!
  • May 2022 Buffet Sale – You Say
  • April 2022 Buffet Sale – A Happy Song
  • April Fools Day Sale – Everything is 60% off!
  • March 2022 Daily Download Freebie Kit & Sale!
Guest Scrap Star Application

Archives

Categories

  • $2 Tuesday
  • Back from the Vault
  • Buffet Sale
  • Challenge Thursday
  • Digital Scrapbooking Freebies
  • Feature Friday
  • Fonts We Love Friday
  • Masters Monday
  • Merry Memories
  • Monthly Bake Sale
  • Monthly Desktop Freebies
  • News & Announcements
  • North Meets South Studios
  • Saturday with the Stars
  • Scrap Saturday
  • Sentiment Sunday
  • Special Request Sunday
  • Sunday Showoffs
  • Uncategorized
  • Wisdom Wednesday

Meta

  • Log in
  • Entries feed
  • Comments feed
  • WordPress.org

Helpful Links

  • Read My Blog
  • Visit My Shop
  • View Your Cart
  • Contact Me

Latest Freebies From My Blog

march 2022 daily download
dsd 2021

ABOUT TRIXIE SCRAPS... I'm Tracy, aka Trixie and owner/designer of Trixie Scraps Designs. I'm a 30-ish mama to 2 fur-babies, Lucy and Diamond. Creative to my core and married to shutterbug/big idea man/best guy ever, Erick. We currently live in a Kansas City suburb... but those who know me best know I'll always be a Jersey girl at heart. I'm a homebody and entrepreneur by nature Read More…

My Memories Suite Software Discount

MyMemories Suite Software Discount

Return to top of page · Copyright © 2025 Trixie Scraps Designs Great Designs. Your Memories. Perfect Together. · This site runs on Genesis for WordPress · Log in

Loading...

Insert/edit link

Enter the destination URL

Or link to existing content

    No search term specified. Showing recent items. Search or use up and down arrow keys to select an item.