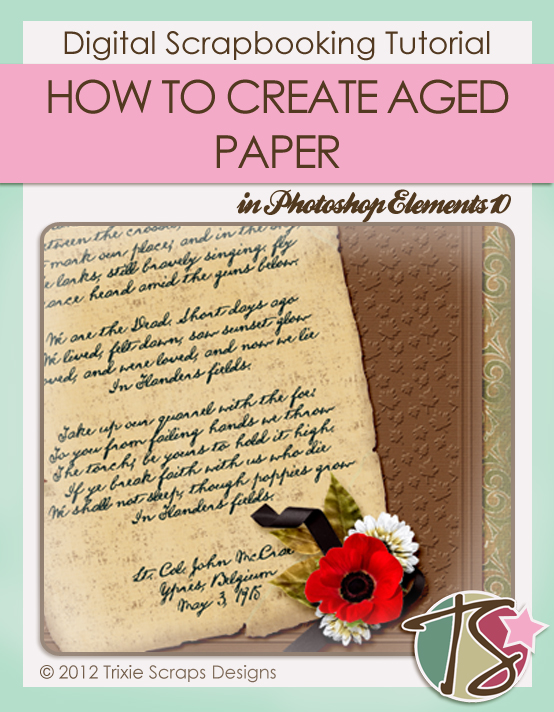
Hello all you Trixie Scrappers. Today is Remembrance Day here in Canada, Veterans’ Day in the US. Military service has pretty much been “the family business” for my family, with members of six consecutive generations serving Canada over ninety-eight years. So today is a day with special meaning for me and mine. My Masters Monday project arose from that; I had very specific ideas about how I wanted my layout to look, but didn’t have any paper in my Trixie stash that was aged just right, so I made some… and I’m going to show you how to do it too.
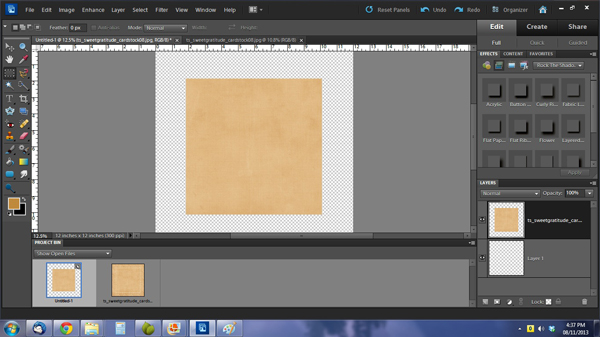
Old paper is somewhat yellowed, maybe torn and creased, and often has discoloured spots known as “foxing”, which can be a homogenous staining, or speckles ant it’s usually a sort of taupe colour. (Any Antiques Roadshow fans out there? You’ll know what I’m talking about.) So you want to start out with a creamy, beigy, grungy kind of paper, maybe with a slight texture to it. I went with a textured cardstock from Sweetened With Gratitude. It has an embossed border so I trimmed that away before I started.
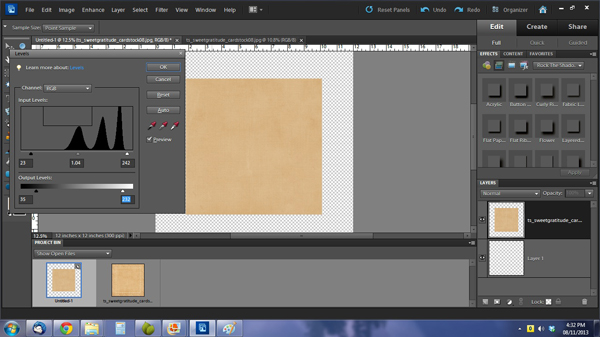
The colour wasn’t quite right so I did some adjusting. I started with Enhance>Adjust Lighting>Levels as shown.
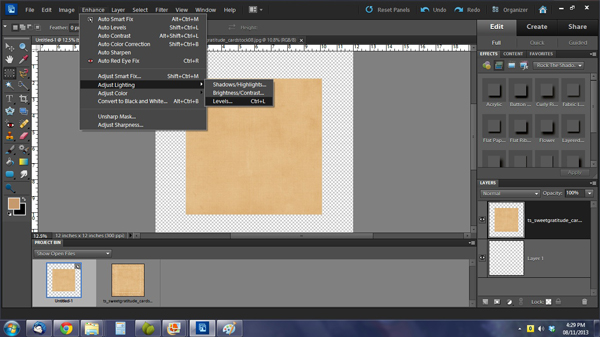
The preview image lets you see what your changes look like, so adjust your levels using the sliders until you get your preview to look more like what you’re after.
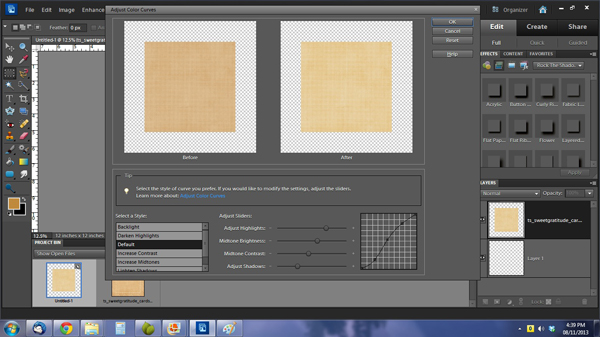
Next I wanted to adjust the colour to more of a yellowed beige. I tried a few different methods but wasn’t happy with any of them until I decided to adjust the colour curves: Enhance>Adjust Color>Adjust Color Curves
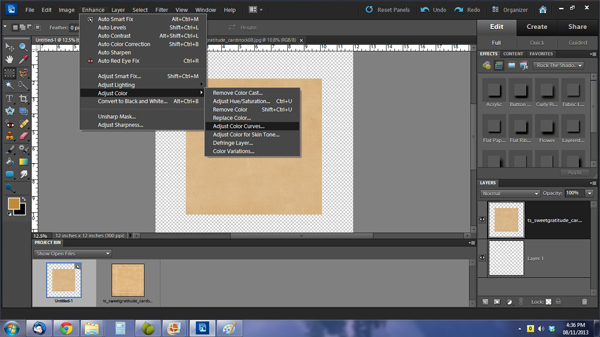
You can use the sliders in this menu to make your tweaks until you get just the right colour for your purpose.
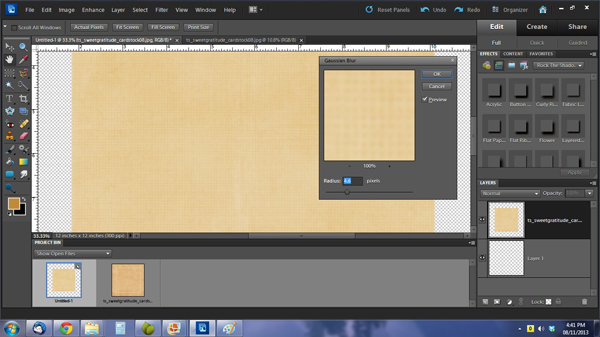
Now, this cardstock is quite heavily textured and although I wanted my paper to look like it could be a high-quality cotton paper, there was just too much texture for me, so I knocked it down a bit: Filter>Blur>Gaussian Blur then adjusted the slider to the look I wanted.
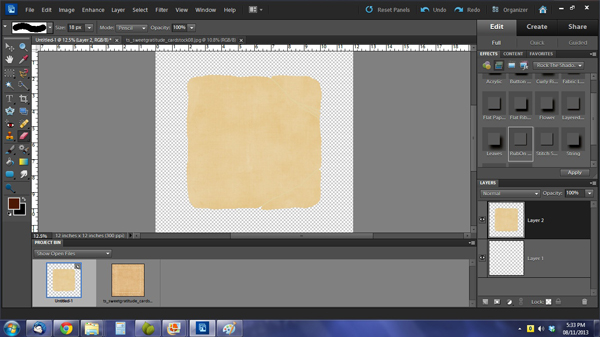
The next few steps for tearing and creasing are all covered in my October 13, 2013 tearing and creasing blog post so you can refer to that tutorial.
Okay! So now we’ve got some pretty distressed paper, but it’s not there yet. All you former paper scrappers who liked to ink your edges should pay special attention to the next few steps, because I’m going to show you how to mimic that effect in PSE! The first step is to select some misty and grungy brushes and a nice brown colour. Click on the foreground colour box and type in “4d1901” in the box under the six little boxes on the right side of the menu.
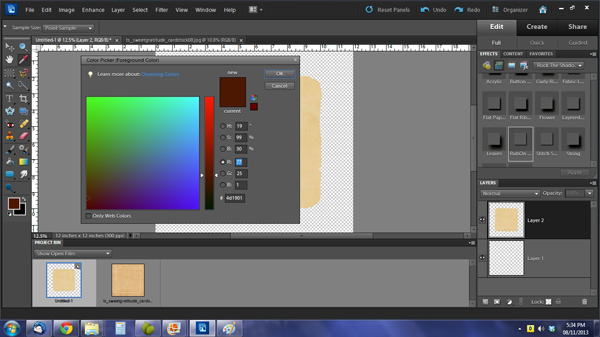
Before we go any further, open a new layer on top of your paper where you can do your inking. I used a grungy brush sized to about 450 pixels, in the Multiply blend mode (there’s a box along the top of your workspace to the right of the brush menu that allows you to change modes) and an opacity of 85%. You can dab with your brush, or you can left click and drag the brush along the edge of the page, depending on your style. I dragged. For the best results, use your brush along the top and right side of your paper, then rotate it (double click on the brush icon at the top of the workspace to get into the brush menu) 180° before doing the bottom edge and left side. Don’t worry if it looks awful… like this:
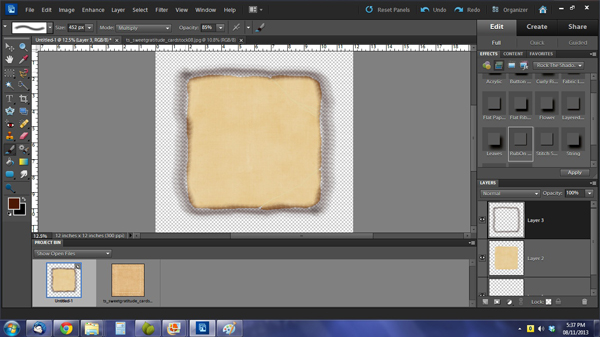
Add some more ink to your layer, using other grungy, misty brushes. Don’t go overboard, you just want to give it a speckled appearance. You also don’t have to ‘colour inside the lines’. To get the perfect foxed paper effect, reduce the opacity of the whole layer where your ink is to somewhere around 60%, or until it looks right.

Now we’re going to clip the inked edge layer to the paper layer CTRL>G and magically, all that messy extra ink is gone.

And we’re done! Merge all your layers, resize your image to 3600×3600 pixels and save it as a .png so you’ll always have a lovely aged paper to use for heritage layouts. A couple of tips for making your text look like old fountain pen ink: Use a dark grey-blue colour with a hint of green (like 281f2c) and then hit it with a filter: Filter>Texture>Texturizer>Canvas with the Scaling set to about 75% and the Relief set to about 12. I’m anxious to see how you use this technique, so please make sure you share your layouts in the Gallery so I can leave you some love! Anybody want to see what I did with mine?

~Jan

All Trixie Scraps Designs products can be found in the following online stores:
Trixie Scraps Shop * My Memories * Gotta Pixel * Ginger Scraps


