Halloween is only what, 2 weeks away and so I’m afraid I’m going to make some enemies with this post, but it’s time to start thinking Holiday cards…Seriously.
I’m one of those people that insist on Halloween getting celebrated, then Thanksgiving (in the US), and after that then, then we can start thinking about Christmas.
But the truth is, if I wait until December starts I won’t get Holiday cards made, let alone get them out before Christmas. So now’s the time to get started. I’m sure most of you know of places to insert your pictures into premade cards and have them shipped around for you. I like to have things more personal. I don’t want the layout that all of my neighbors and family have chosen.
This is where your digi scrapping kits come in. For this tutorial I am using Trixie’s Winter On The Mountain. I’m also working with Corel Paintshop Pro, so things will be different if you are using a different program.
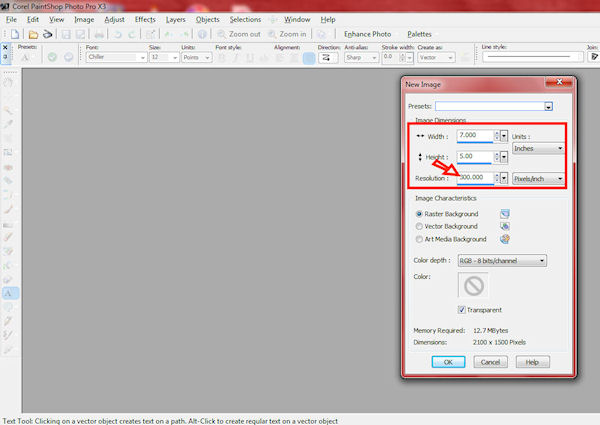
To start off, you want to decide what size card you want to make. Decide ahead of time where you’re going to get your card printed off and figure out what sizes they have available for personalized layouts. For this, I’m going with a standard picture size of 5×7. It’s also important to make sure your resolution is set to 300 pixels so that it prints off correctly.
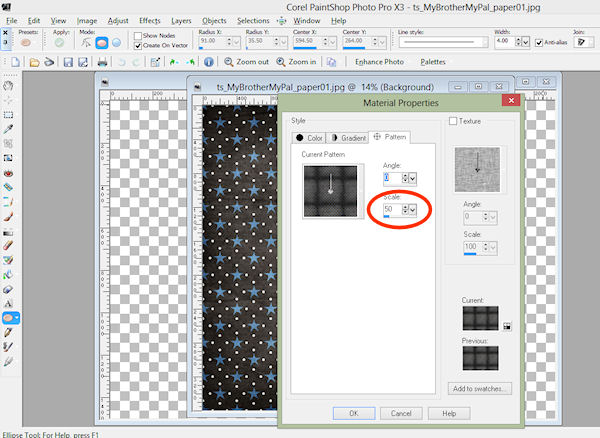
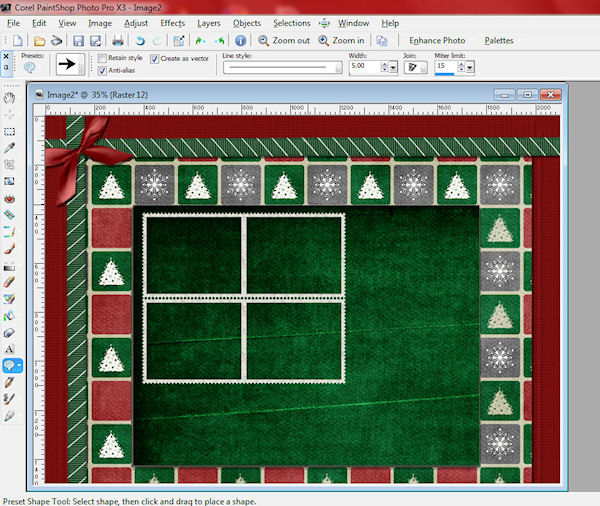
Right off you’re going to notice that background papers don’t fit. They are way too large for something of this nature. You fix that look by going into your PATTERN PROPERTIES and SCALE. I thought a scale of 58% would work best for my main background.
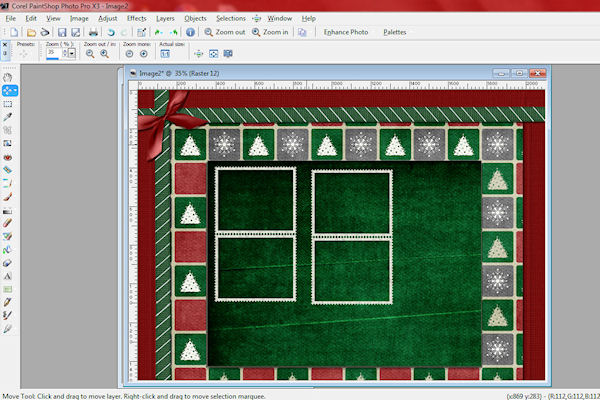
Go ahead and get your background all situated along with any other papers you may want to add. For mine I added 2 more backgrounds along with a ribbon border along the top and left side of my second background.
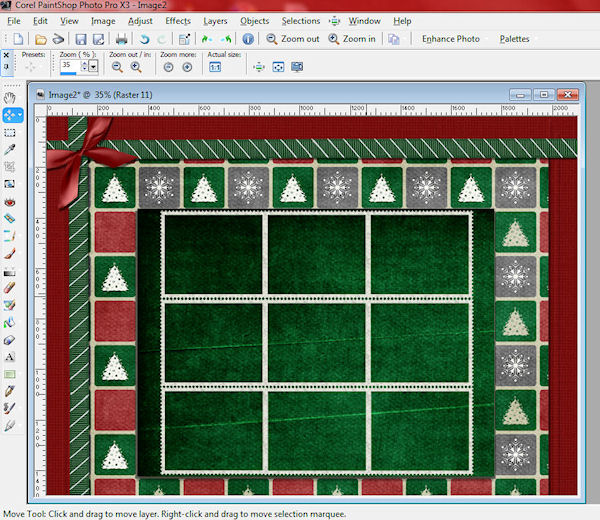
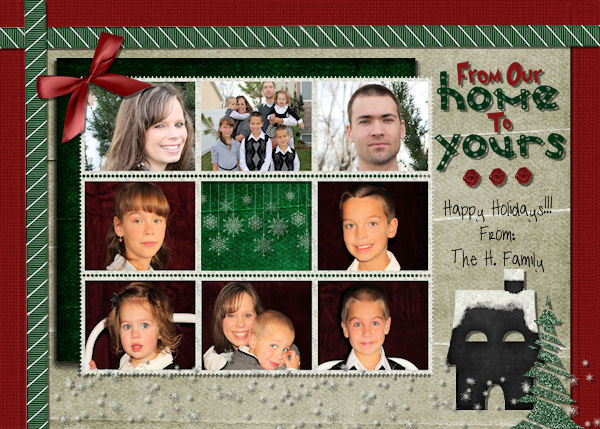
Next I wanted to add my picture frames. I wanted a grouping of 9, so I had to get creative with the frame. I found a frame set of 2 that I really liked the look of and went about making it into a group of 9.
Because of the little scallops along the edges of this frame cluster, I zoomed in to make sure I was lining up the frames.
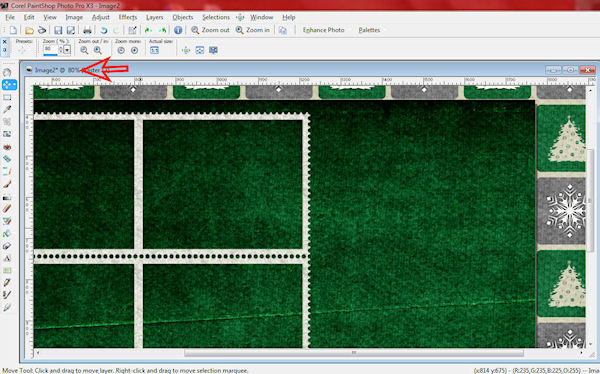
After I got three lined up along the top, I still needed 3 more frames. So I added another set, but made sure to line the top of the new frame to the bottom of the previously placed frame.
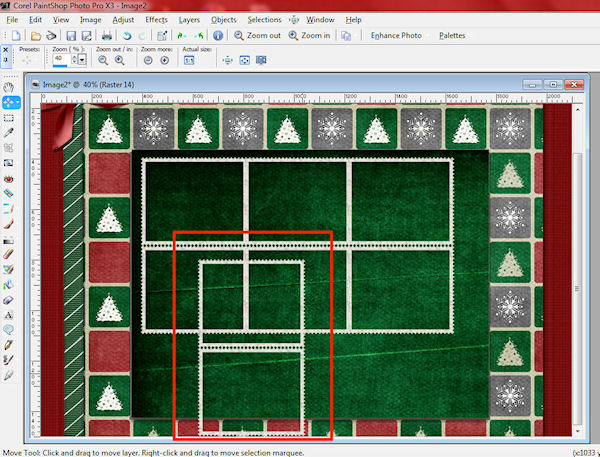
Now, it didn’t fit exactly, so I made sure I was on the newest frame layer, selected and deleted the current top of the frame – so all I’m left with is the bottom of the previously placed frame and the current bottom frame.
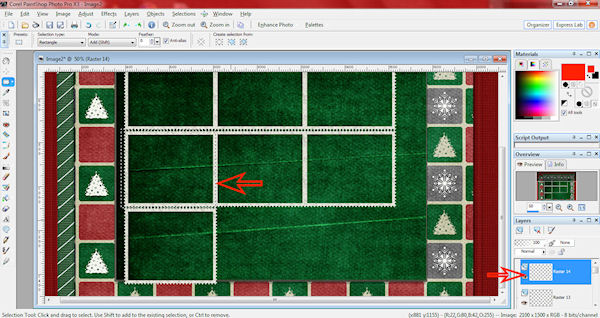
I did this for the next 2 picture frames that I needed.
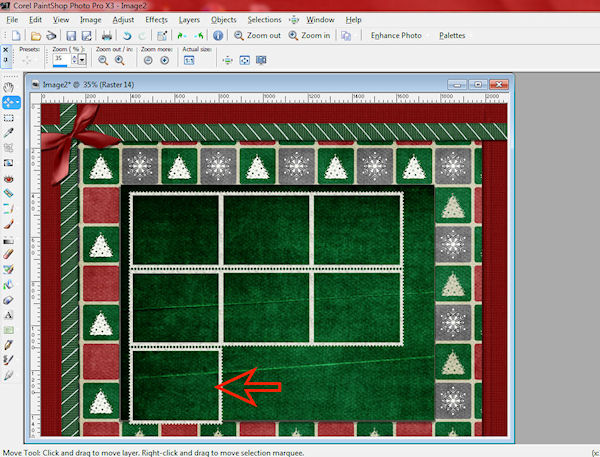
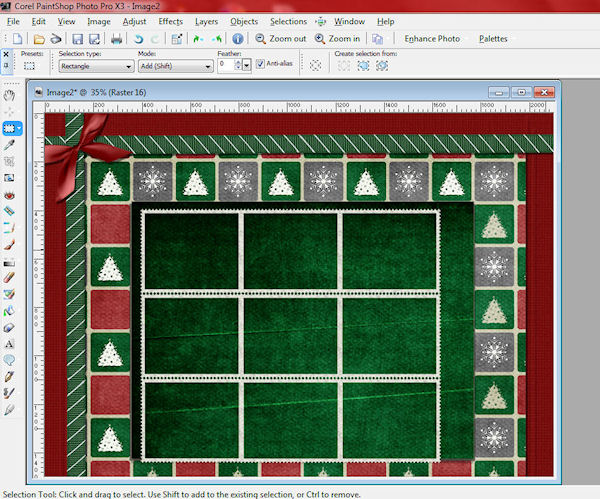
When all the frames were put together, I noticed right away that it wasn’t where I wanted it.
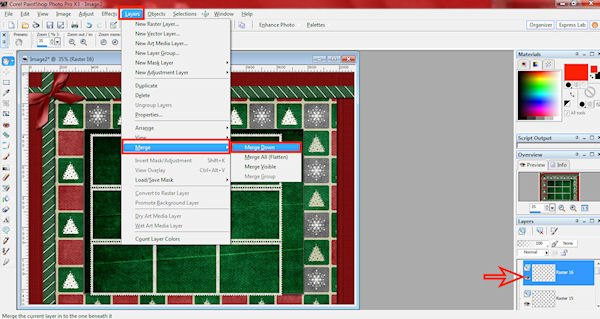
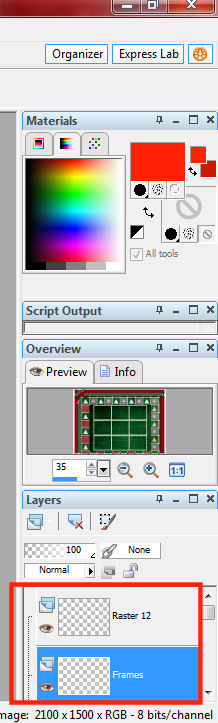
To fix this issue easily and without moving piece by piece – I merge all of my frame layers together. Select your topmost layer and then in your menu bar go to LAYERS, MERGE, MERGE DOWN.
You’ll want to do this with each piece of the frame, but make sure you stop when you have one frame piece (which is actually the whole frame now) on top and the 3rd background layer underneath it.
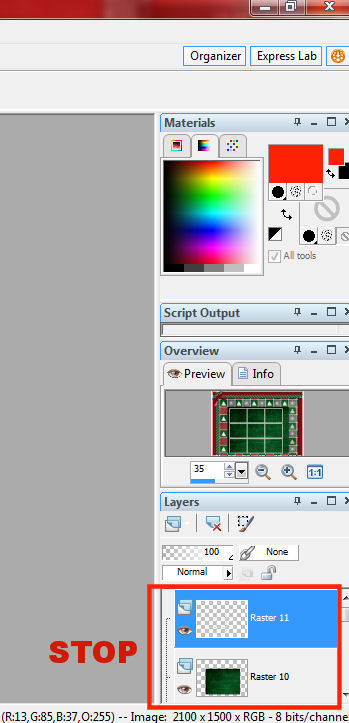
You’ll now be able to move the whole frame around and place it where it needs to be placed.
Now comes the fun part of adding in the pictures. I’m going to show you the way I do this.
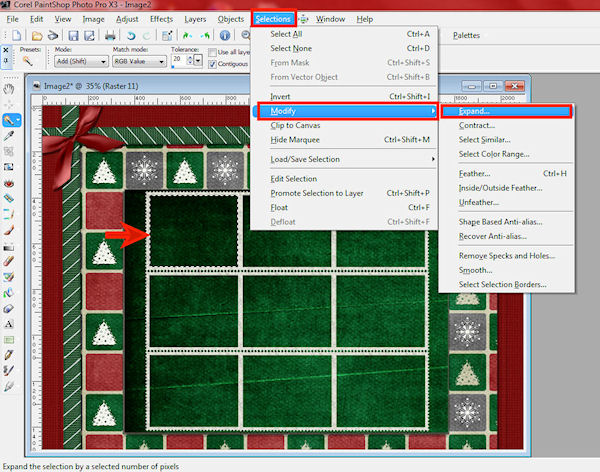
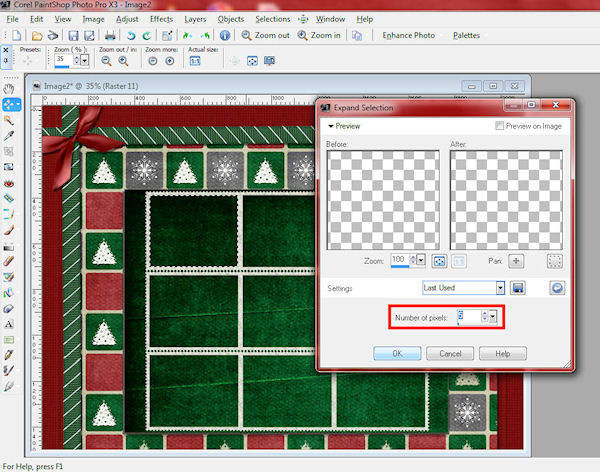
First I select the area of the frame I’m putting the picture into. I then expand my selection by a few pixels. The pixel amount depends on the frame you’re using and the size. For this project a size of 5 gave me just what I needed.
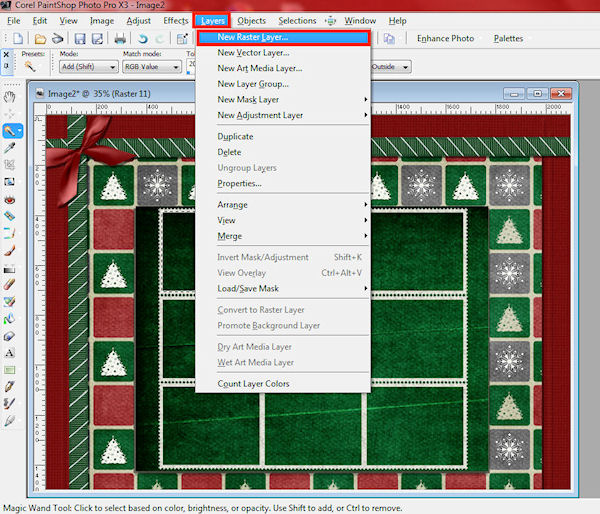
I then create a new layer.
Next we move over to the picture we want to work with. I make a selection in the shape of the shape the frame is.
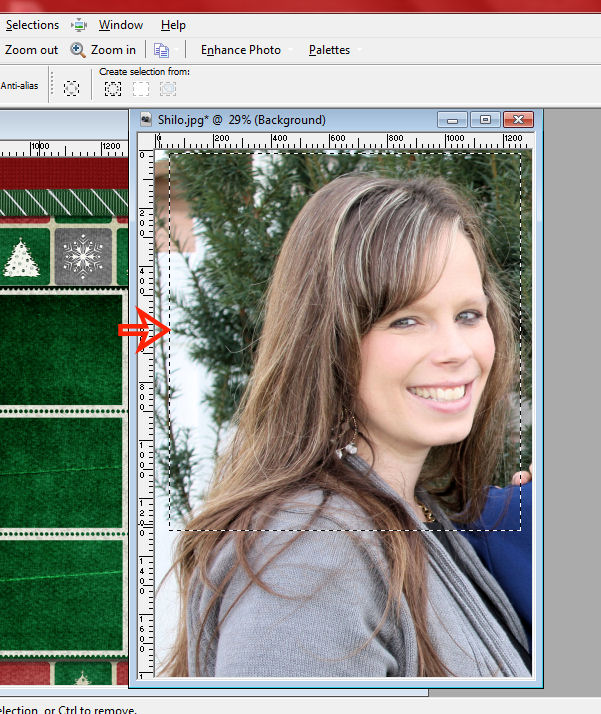
When I have the picture selected the way I want it I then copy it.
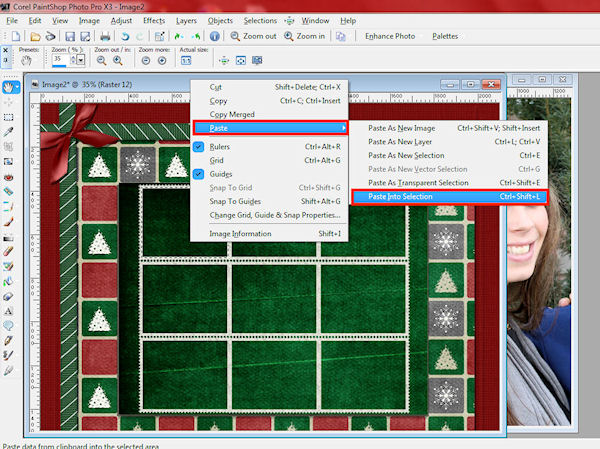
We move back over to our frame layer and making sure we are on the new layer we created, we paste the picture into our frame selection.
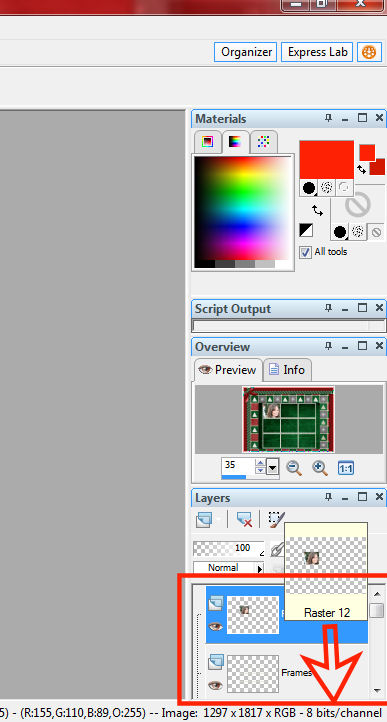
Our picture is going to be on top of our frame but we easily fix that by moving the picture layer underneath the frame layer.
You’ll follow these steps for each picture you add in.
When you’ve got all your pictures in your frame, you’ll once again want to merge all those layers down, so that if you need to move and reorganize things, you can do so easily and the frame and pictures are all one layer. Make sure you stop merging once the frame layer is again the top layer and right under that is your 3rd background.
You then go about adding in your embellishments and text and you then have a completed card and it doesn’t look like everyone else’s. Don’t be afraid to change colors around and backgrounds around if you find things aren’t working exactly the way you began with. You’ll notice that my finished product is slightly different than that of the screenshots. I had to move things around and play with things until I was happy.
Now off you go to make your holiday cards. Seriously, don’t wait!!! It’s kind of fun making Holiday cards around Halloween. Make sure you share in the gallery if you do so.

All Trixie Scraps Designs products can be found in the following online stores:
Trixie Scraps Shop * My Memories * Gotta Pixel * Scrapbook Bytes


