Welcome to Tips, Trends, and Techniques Tuesday! Melissa here, with a tutorial that tons of girls have been begging for – clustering! Despite my BFF’s nickname for me, “Cluster Queen,” I do not pretend to know even close to all there is to know about this subject, but I am here to give you some tips and tricks that have worked for me in achieving some eye-catching clusters!
I am going to demonstrate using the layout I created with Trixie Scraps’ fabulous collab kit with Simply Scraps, Gotta Hug (retired).
Here is my finished LO:
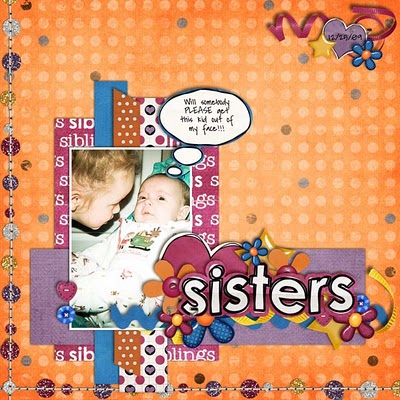
That’s a lot of layers, right? Now, let’s break it down bit by bit.
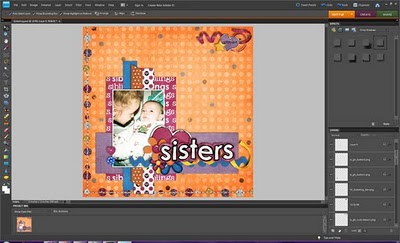
Ok, here is my page with only the papers and photo:

The first thing I want to do is determine title placement. I do a lot of layering under and around my title, so I like to plan out where it will be. The perfect location is on the bottom right, where the empty space is on the purple paper. Underneath the title, I add a piece of blue ricrack and yellow ribbon, and I wind the yellow ribbon around the rickrack, tucking part of it under the photo.

Next, I will determine where I want my remaining clustering to be. I already know that I will have a cluster around the title.
The best rule for keeping things appealing is to remember to use a visual triangle. By placing your elements in a triangle around your page, you draw a person’s eye around the page and make the page more visually pleasing. Keeping this in mind, I add a button to the bottom left hand corner of the photo and a heart with the date on it to the upper right hand corner of the page, thus creating a triangle effect between the three points. If you imagine a diagonal line between the button and the heart, a straight line from the heart to the title, and a straight line from the title to the button, you have a triangle. You can create visual triangles in all sorts of ways, and they are so helpful to element placement!
So this is what we have now:

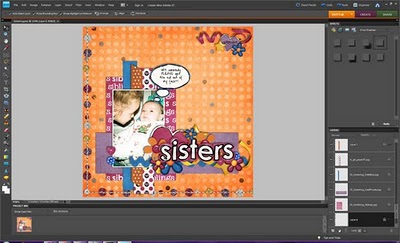
Here is where I will start filling in, or finishing. I will slowly add elements until things look right.
When adding elements, I try to pay attention to dimension (can items be layered in real life the way I layer them on my page) and size, it is important to keep items realistic in size and not too big.
Under my title, I have added a paper flower and heart, and two puffy acrylic flowers. Since the orange paper flower has a button on it, I put it on top of these other elements, because it is hard to layer items on top of a button. Over to the left, I add one more button, on top of the photo. And then in the upper right hand corner, I added a curled ribbon under the paper heart, and stapled the heart to it. I added an acrylic star as well, just barely sitting on the edge of the heart.
Now for many people, this would be done. And honestly, if you wanted to finish the layout here, it would be fine. I just really wanted to do a bigger cluster around the title. So, I fill in a little more, adding elements and again paying attention to dimension.

I’m nearly finished now! The cluster around the title looks great, but it is a little out of balance. there is a heaviness to the left, and I want to even that out. So I add some more elements under and around the title work. I also want to add a couple of more items to the upper right, around the date, to achieve a bit more balance. Since there is already a lot of action at the bottom, I decide to leave the two buttons alone on the photo. I also added a chat bubble above the photo.
And voila! We are done! The most important thing to remember when clustering is there are as many different ways to cluster as there are to scrapbook. In fact, everyone develops a style that is uniquely their own, and that is what draws people to your pages. If you try to do something that is not comfortable for you it may end up looking forced, so try and try again. Stacking, or clustering, or layering elements in a believable and visually pleasing way can add so much to your pages, so I hope this tutorial has helped point you in the right direction!
Thanks for stopping by and happy scrapping!


